| .. | ||
| config.json | ||
| icon.png | ||
| logo.png | ||
| README.md | ||
ESPHome Hass.io Add-On
About
This add-on allows you to manage and program your ESP8266 and ESP32 based microcontrollers directly through Hass.io with no programming experience required. All you need to do is write YAML configuration files; the rest (over-the-air updates, compiling) is all handled by ESPHome.

View the ESPHome documentation here
Example
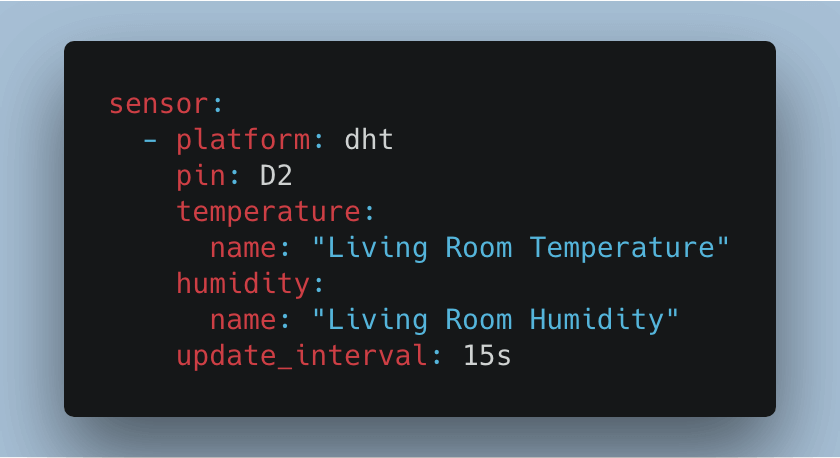
With ESPHome, you can go from a few lines of YAML straight to a custom-made firmware. For example, to include a DHT22. temperature and humidity sensor, you just need to include 8 lines of YAML in your configuration file:

Then just click UPLOAD and the sensor will magically appear in Home Assistant:

Installation
To install this Hass.io add-on you need to add the ESPHome add-on repository first:
- Add the epshomeyaml add-ons repository to your Hass.io instance. You can do this by navigating to the "Add-on Store" tab in the Hass.io panel and then entering https://github.com/esphome/hassio in the "Add new repository by URL" field.
- Now scroll down and select the "ESPHome" add-on.
- Press install to download the add-on and unpack it on your machine. This can take some time.
- Optional: If you're using SSL certificates and want to encrypt your communication to this add-on, please enter
trueinto thesslfield and set thefullchainandcertfileoptions accordingly. - Start the add-on, check the logs of the add-on to see if everything went well.
- Click "OPEN WEB UI" to open the ESPHome dashboard. You will be asked for your Home Assistant credentials - ESPHome uses Hass.io's authentication system to log you in.
NOTE: Installation on RPis running in 64-bit mode is currently not possible. Please use the 32-bit variant of HassOS instead.
You can view the ESPHome docs here: https://esphome.io/
Configuration
Note: Remember to restart the add-on when the configuration is changed.
Example add-on configuration:
{
  "ssl": false,
  "certfile": "fullchain.pem",
  "keyfile": "privkey.pem",
  "port": 6052
}
Option: port
The port to start the dashboard server on. Default is 6052.
Option: ssl
Enables/Disables encrypted SSL (HTTPS) connections to the web server of this add-on.
Set it to true to encrypt communications, false otherwise.
Please note that if you set this to true you must also generate the key and certificate
files for encryption. For example using Let's Encrypt
or Self-signed certificates.
Option: certfile
The certificate file to use for SSL. If this file doesn't exist, the add-on start will fail.
Note: The file MUST be stored in /ssl/, which is the default for Hass.io
Option: keyfile
The private key file to use for SSL. If this file doesn't exist, the add-on start will fail.
Note: The file MUST be stored in /ssl/, which is the default for Hass.io
Option: leave_front_door_open
Adding this option to the add-on configuration allows you to disable
authentication by setting it to true.
Option: esphome_version
Manually override which ESPHome version to use in the addon.
For example to install the latest development version, use "esphome_version": "dev",
or for version 1.10.0: "esphome_version": "v1.10.0"".
Please note that this does not always work and is only meant for testing, usually the ESPHome add-on and dashboard version must match to guarantee a working system.


