1.9 KiB
Create a Project
In Harbor, you create different projects to which you assign users so that they can push and pull image repositories. You also configure project-specific settings. When you first deploy Harbor, a default public project named library is created.
Prerequisites
Log in to Harbor with a Harbor administrator or project administrator account.
Procedure
-
Go to Projects and click New Project.
-
Provide a name for the project.
-
(Optional) Check the Public check box to make the project public.
If you set the project to Public, any user can pull images from this project. If you leave the project set to Private, only users who are members of the project can pull images. You can toggle projects from public to private, or the reverse, at any moment after you create the project.

-
Click OK.
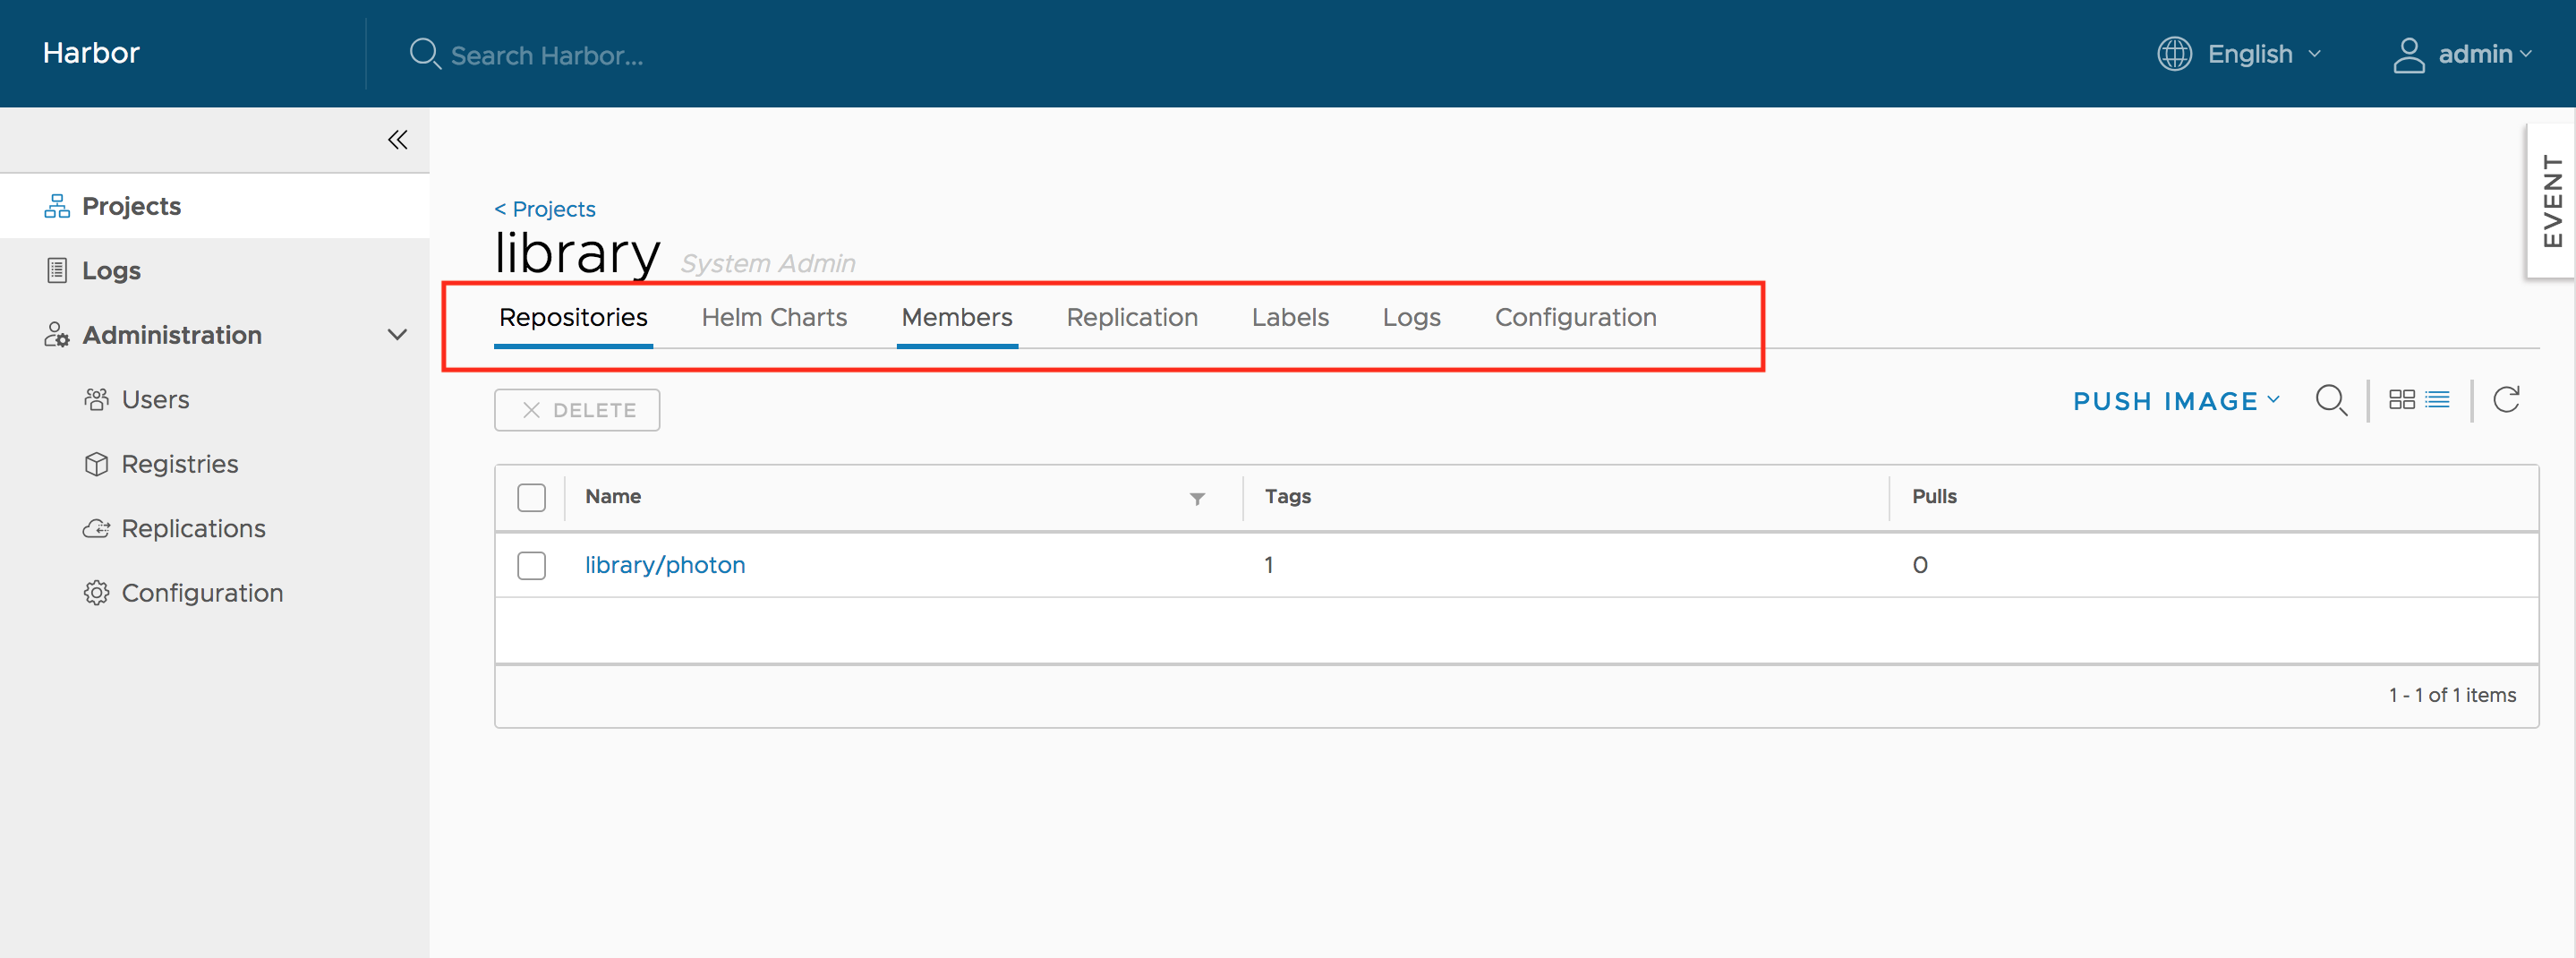
After the project is created, you can browse repositories, members, logs, replication and configuration using the navigation tab.
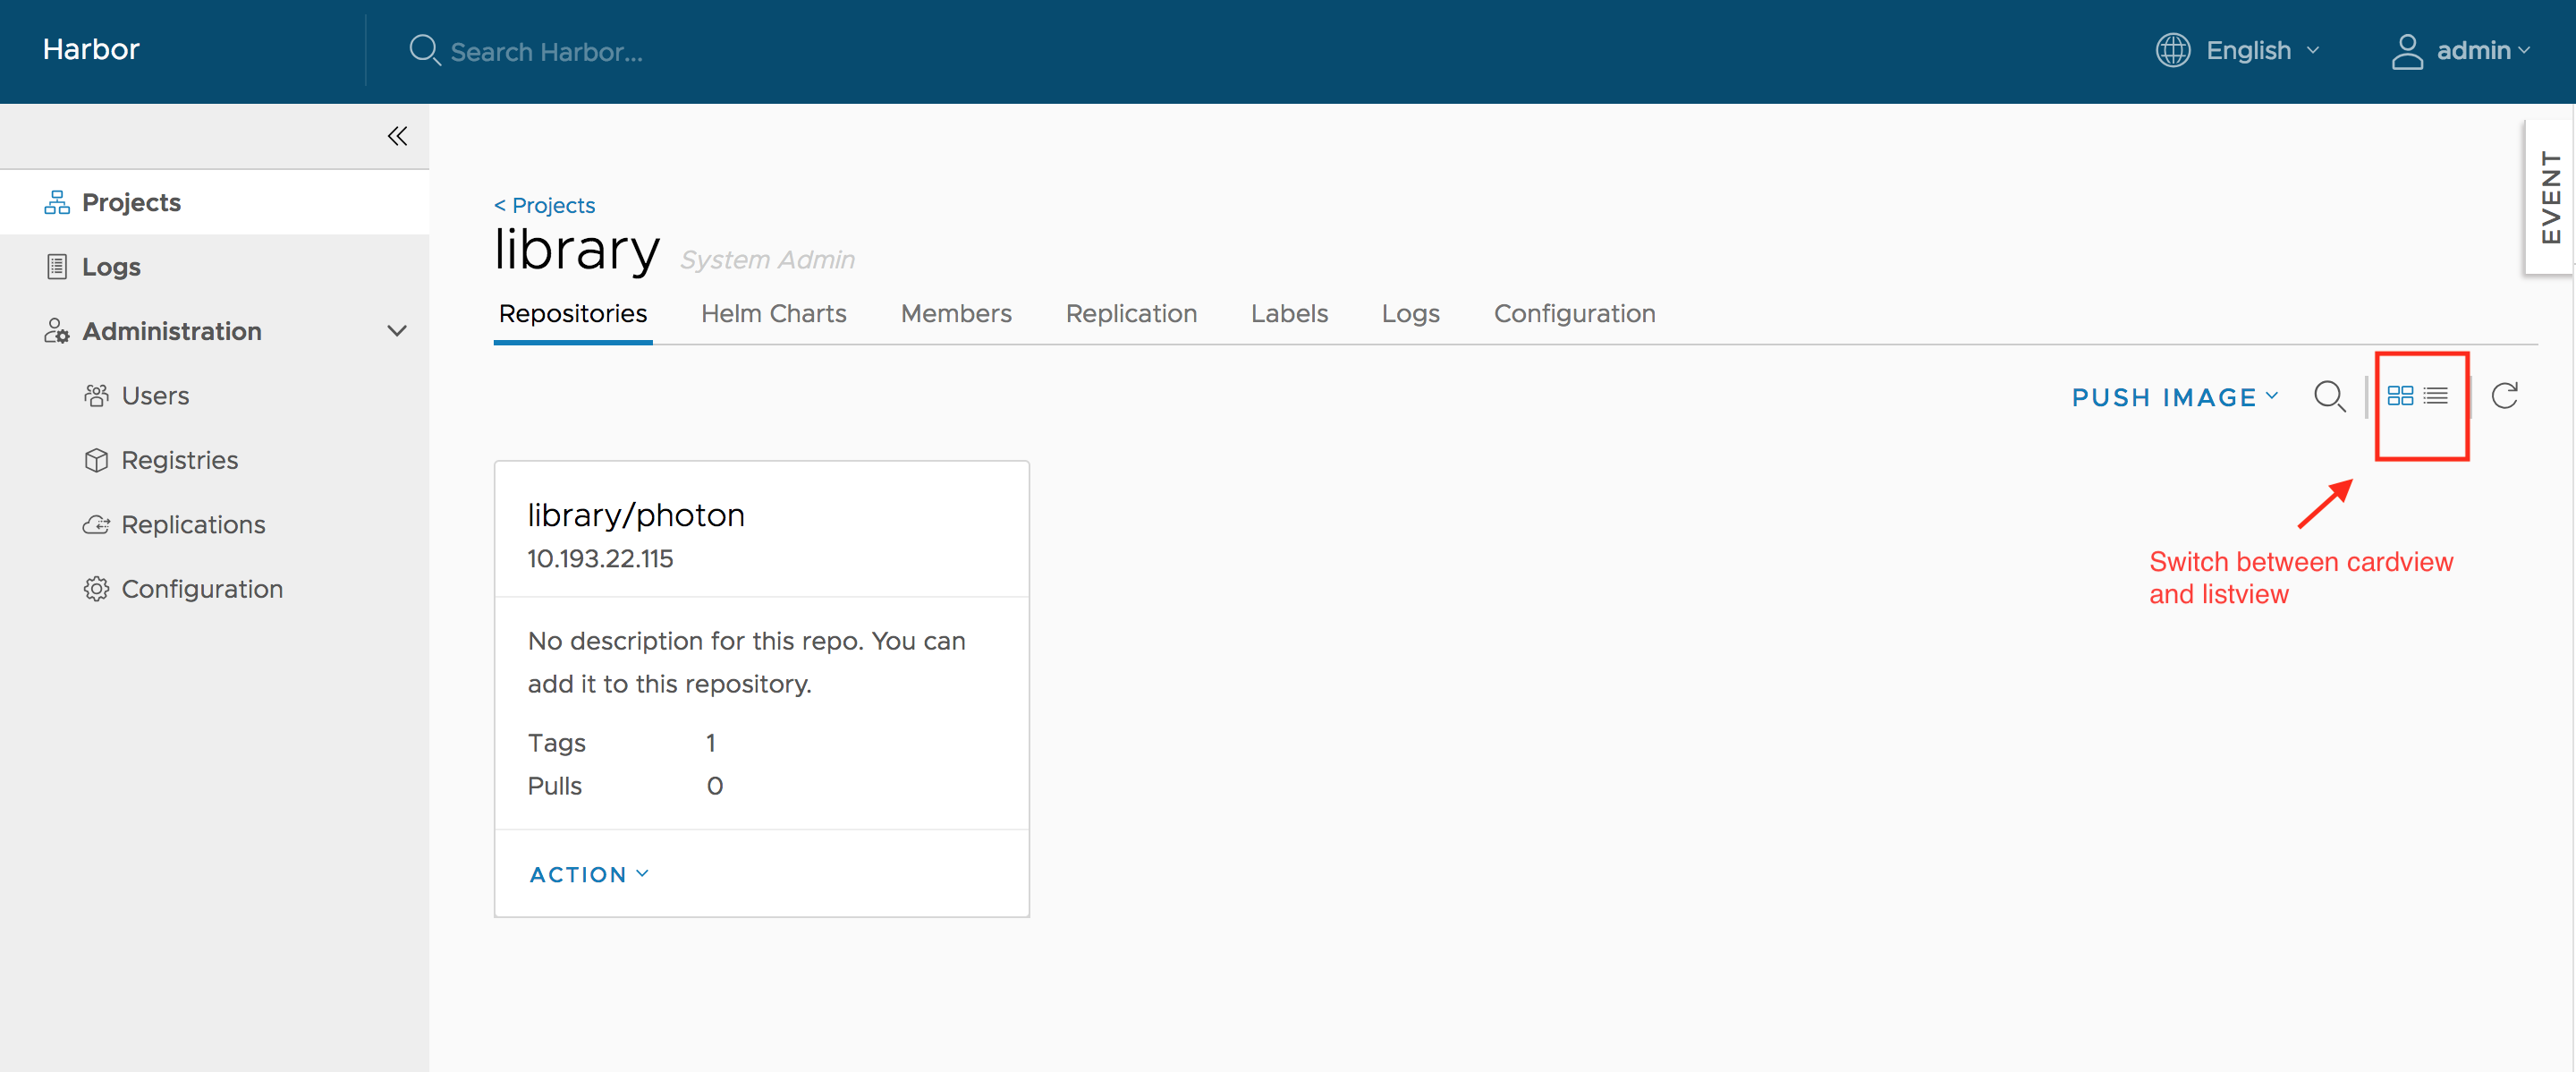
There are two views to show repositories, list view and card view, you can switch between them by clicking the corresponding icon.
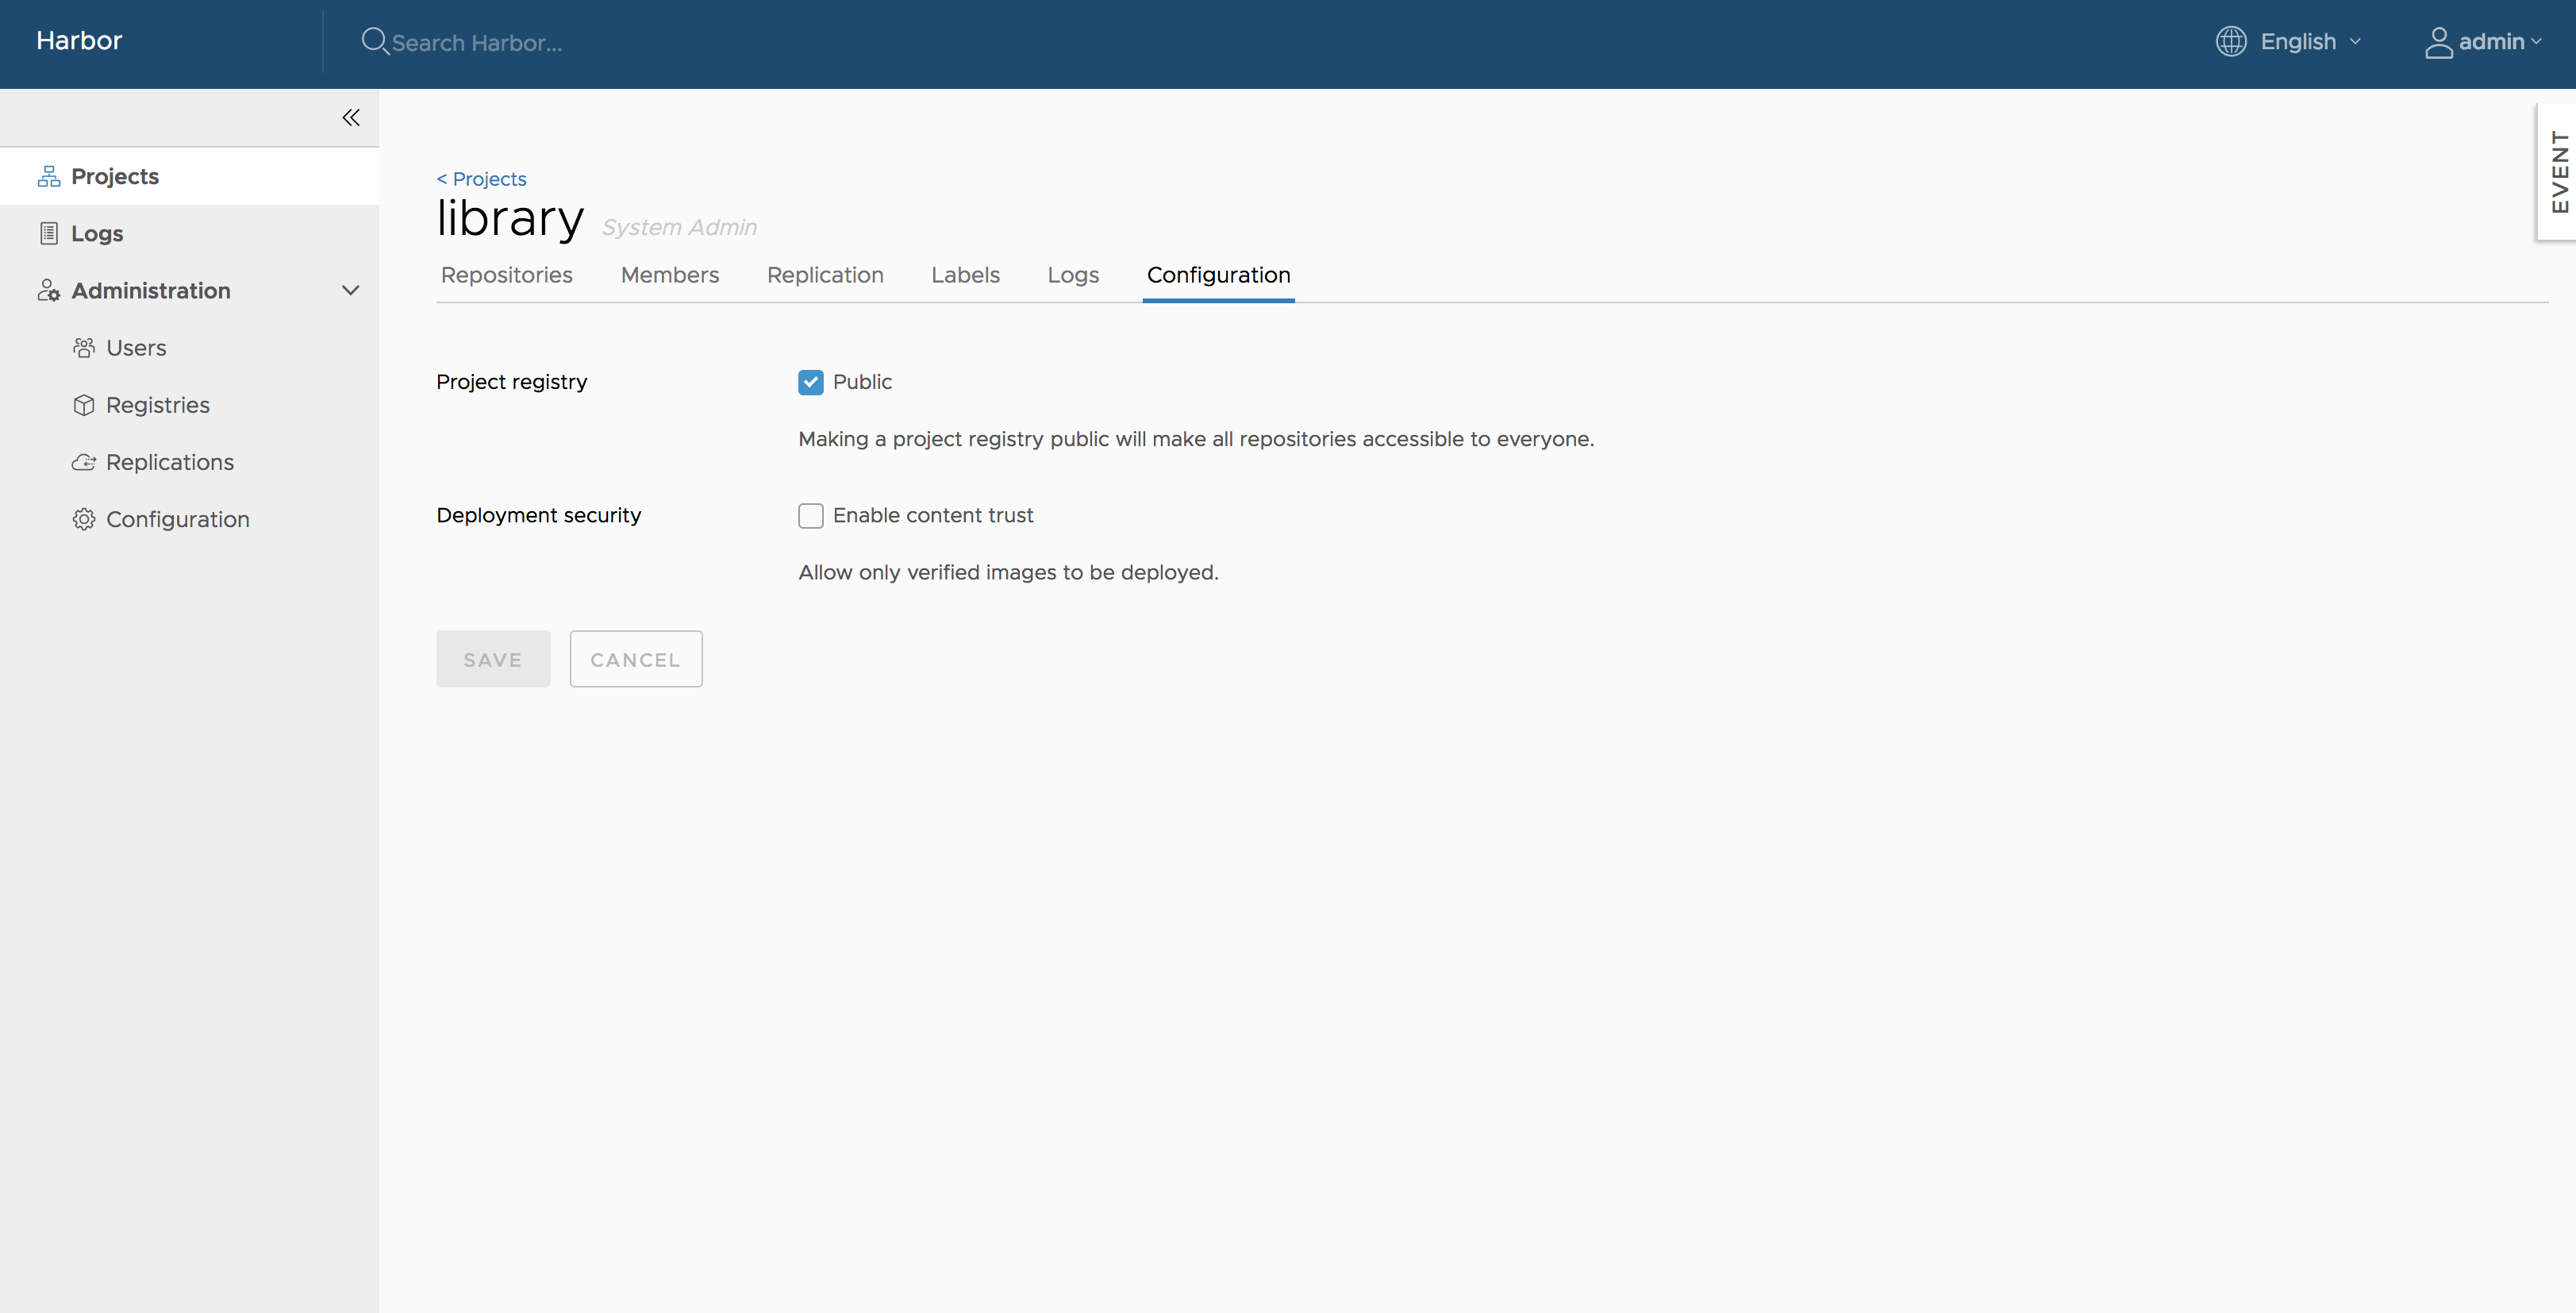
Project properties can be changed by clicking "Configuration".
-
To make all repositories under the project accessible to everyone, select the
Publiccheckbox. -
To prevent un-signed images under the project from being pulled, select the
Enable content trustcheckbox.
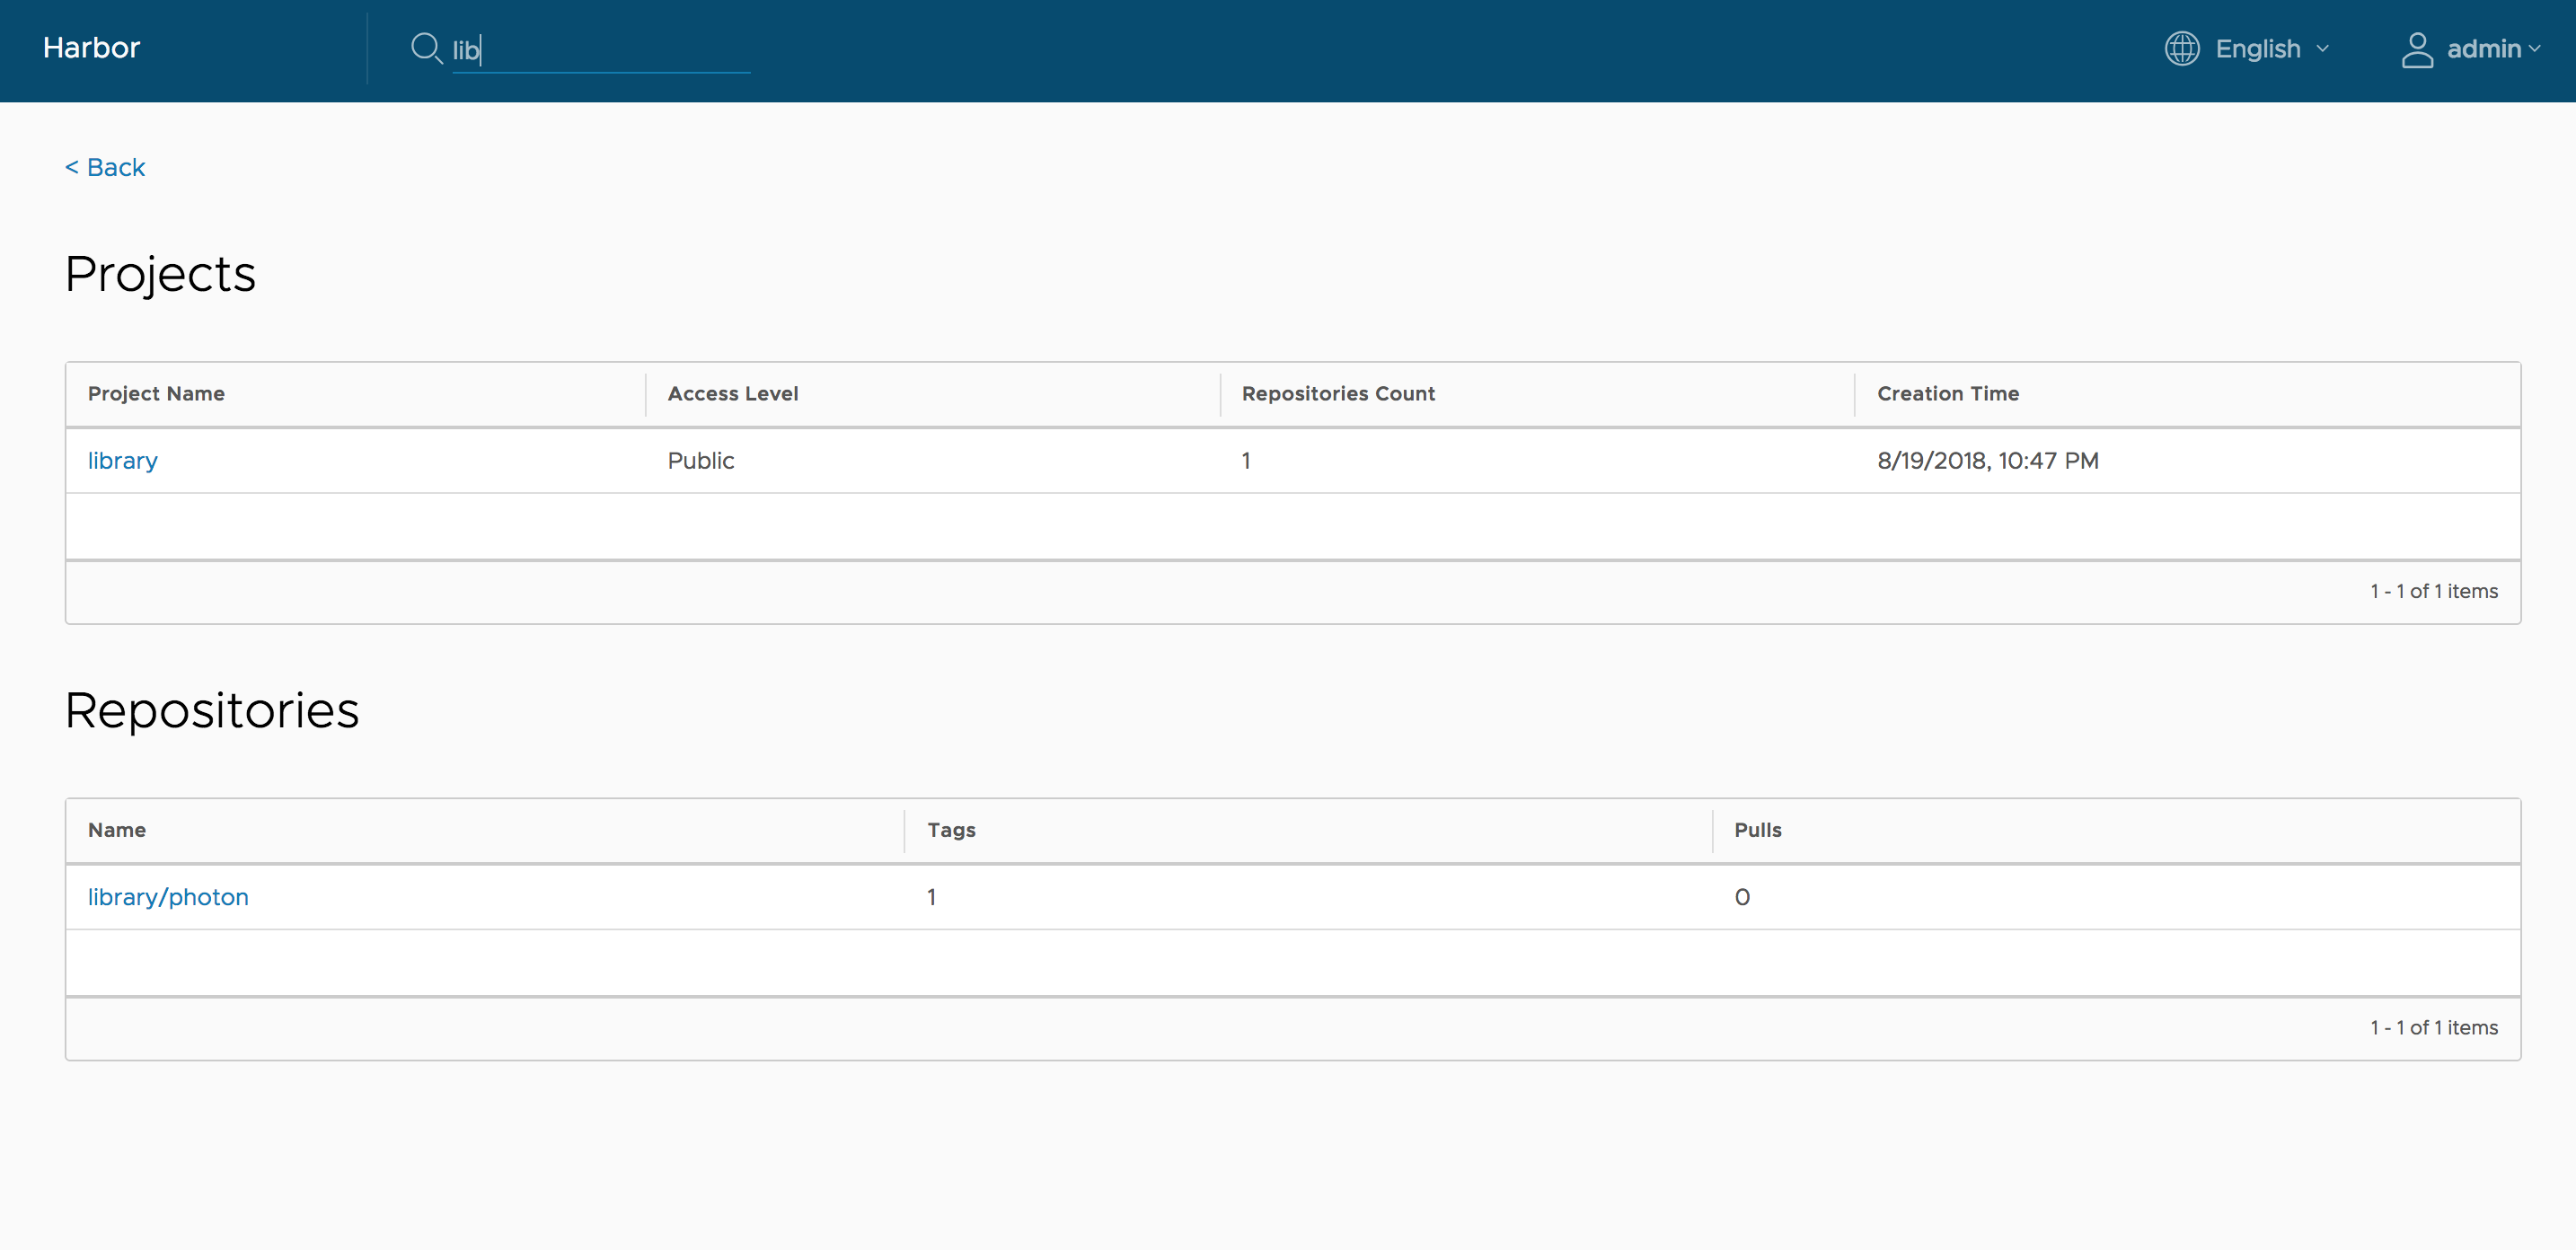
Searching Projects and Repositories
Entering a keyword in the search field at the top lists all matching projects and repositories. The search result includes both public and private repositories you have access to.