mirror of
https://github.com/goharbor/harbor.git
synced 2024-11-23 02:35:17 +01:00
1.8 KiB
1.8 KiB
#How to use your own certificate in harbor?
1.If you already have a certificate, go to step 3.
2.If not, you can generate a self-signed certificate using openSSL with following commands
1)Generate a private key:
openssl genrsa -out prvtkey.pem 2048
you can call it prvtkey.pem or other names you like.


2)Generate a certificate:
openssl req -new -x509 -key prvtkey.pem -out cacert.pem -days 1095
prvtkey.pem is what you generated in the first step, if you change the name, you should change it in the command. Also you can name cacert.pem what you like.
3.Clone harbor to your local position. Then open Deploy, and edit the harbor.cfg, make necessary configuration changes such as hostname, admin password and mail server. Refer to Installation Guide for more info. then execute ./prepare . Here, harbor generates several config files. We need to replace the original private key and certificate with your own key and certificate.
4.Following are what you should do:
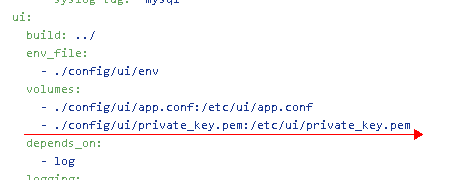
a.edit docker-compose.yml, find private_key.pem replace it with your own private key as following:
b.cd config/ui, you will see private_key.pem.

c.replace private_key.pem with your private key.

d.cd ../registry, you will see root.crt. Replace it with your certificate.

e.at the same directory, you will see config.yml. We need to modify it, open it and find root.crt, then change it to your certificate.
5.After these, go back to harbor directory, execute:
docker-compose build
docker-compose up –d
6.Then you can push/pull images to see if your own certificate works. Please refer User Guide
