5.9 KiB
Installing and Configuring Harbor on vSphere as Virtual Appliance
This guide walks you through the steps about installing and configuring Harbor on vSphere as an virtual appliance (OVA). If you are installing Harbor on a Linux host, refer to this Installation Guide.
Installation
-
Download the OVA file to your local disk from the official release page.
-
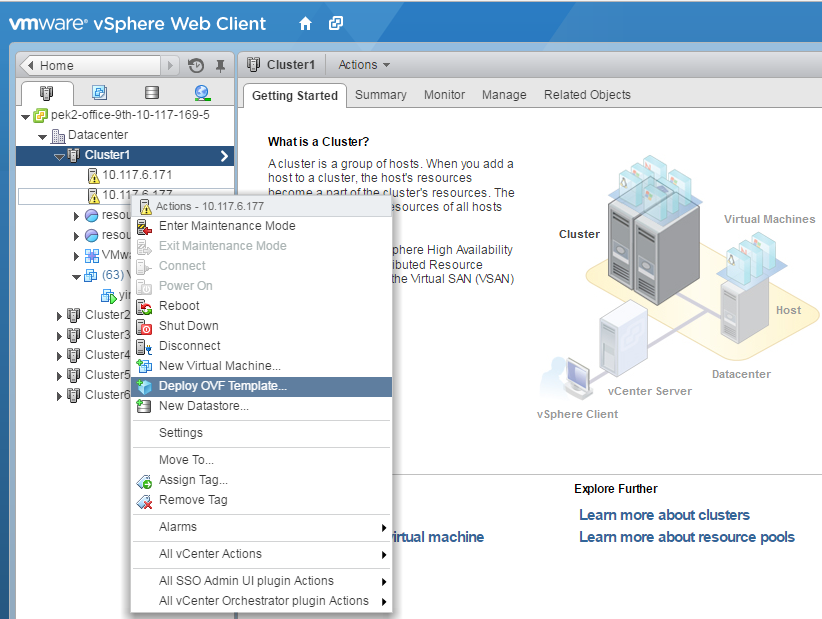
Log in vSphere web client. Right click on the datacenter, cluster or host which Harbor will be deployed on. Select "Deploy OVF Template" and open the import wizard.
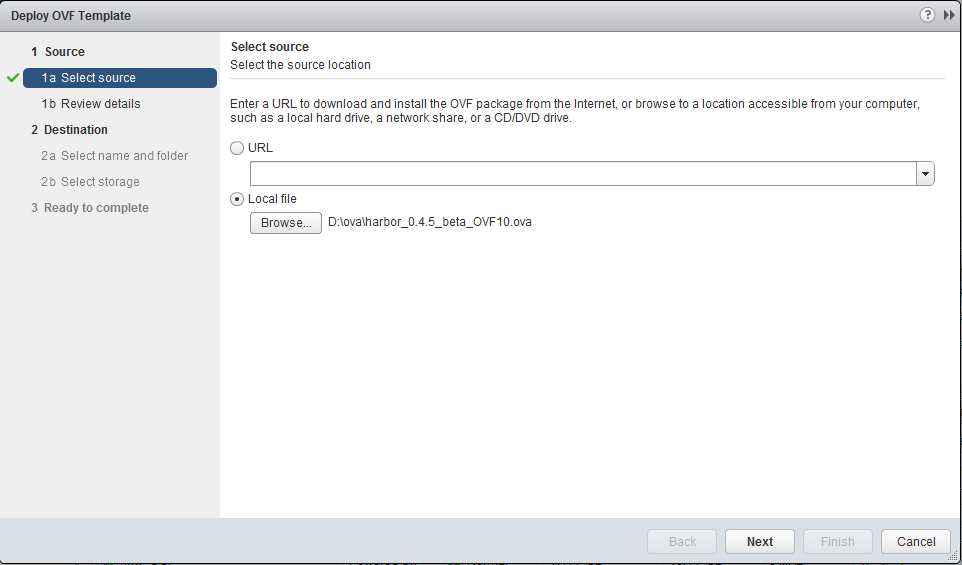
- Select the OVA file from your local disk and click "Next".
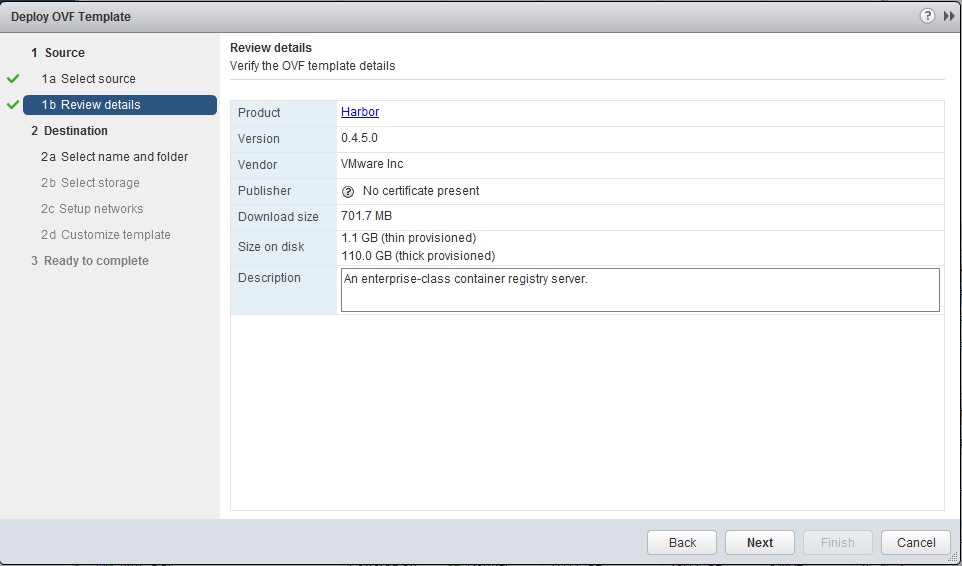
- Review the OVF template details and click "Next".
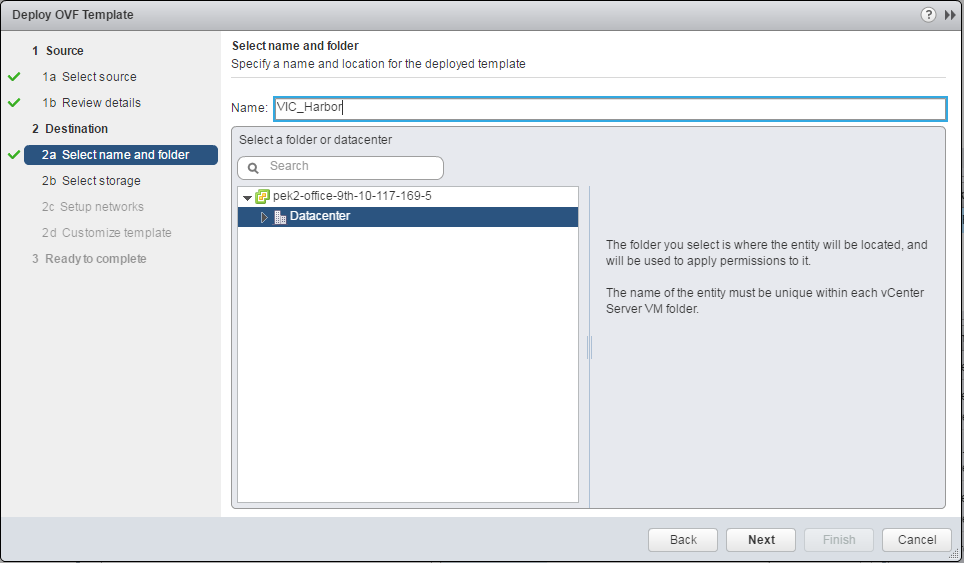
- Spefify a name and a location for the virtual appliance.
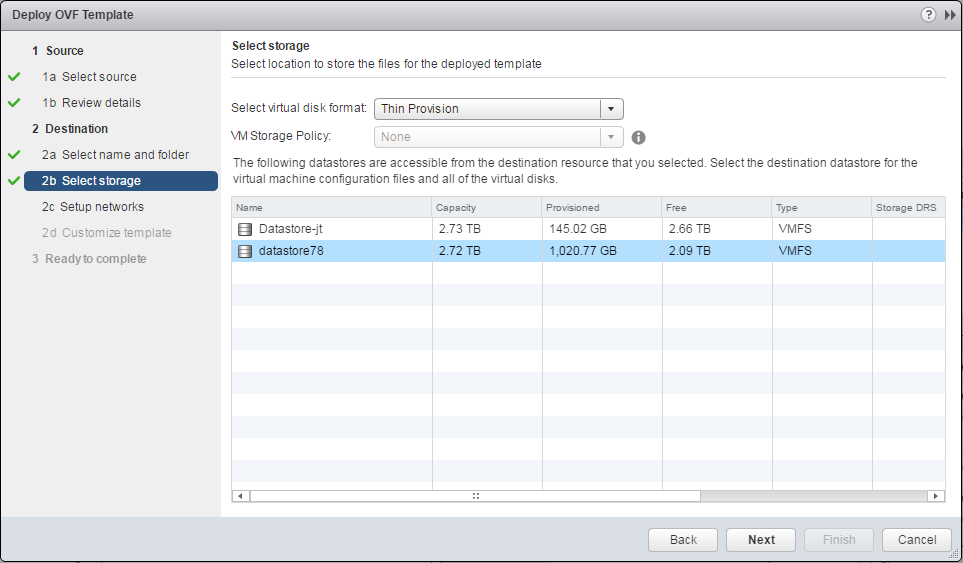
- Select the datastore and virtual disk format, click "Next".
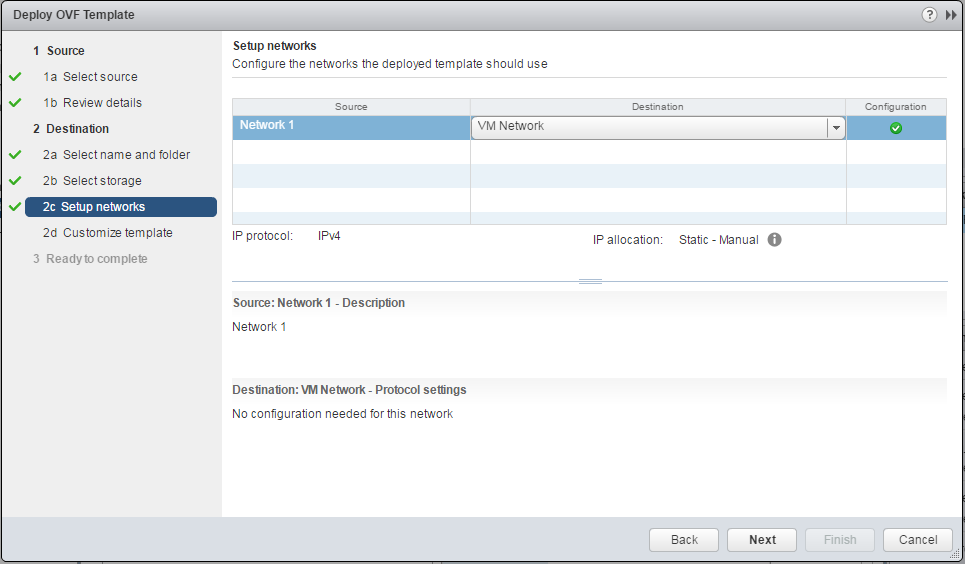
- Configure the network(s) the virtual appliance should be connected to.
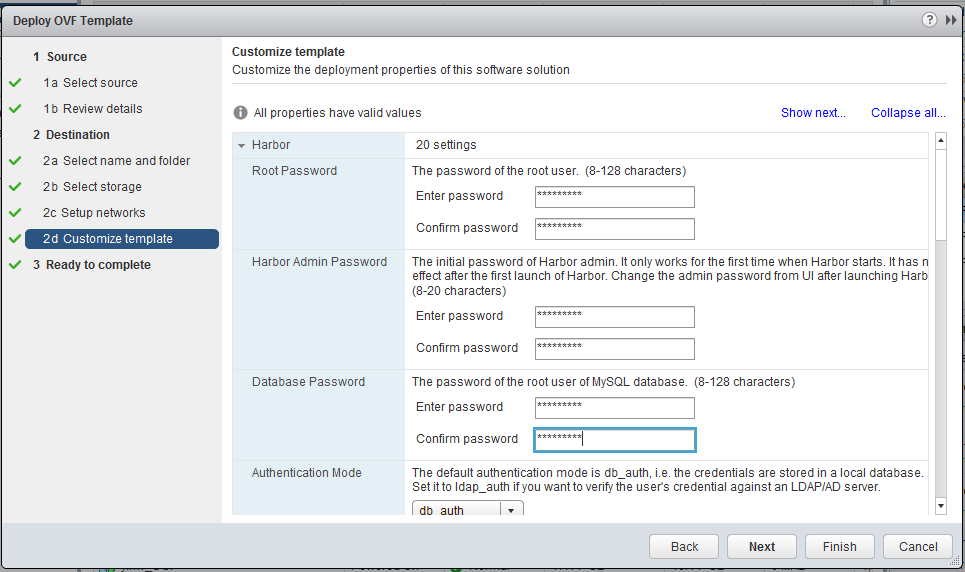
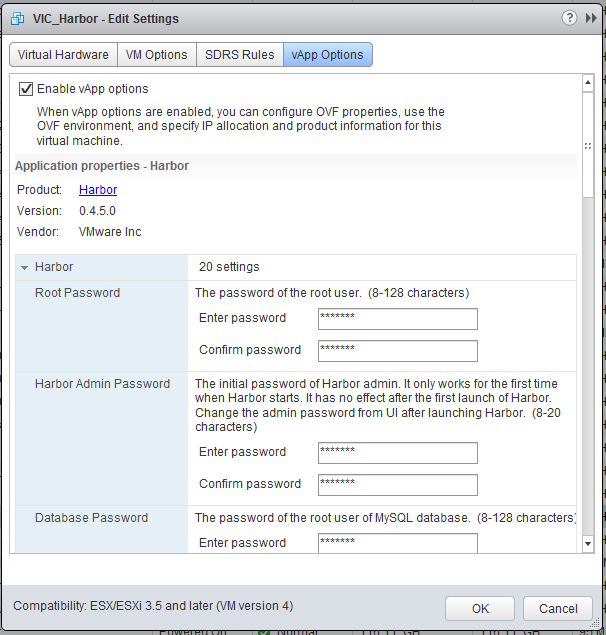
- Customize the properties of Harbor. The properties are described below. Note that at the very least, you just need to set the Root Password, Harbor Admin Password and Database Password properties.
-
Harbor
- Root Password: The password of the root user.
- Harbor Admin Password: The initial password of Harbor admin. It only works for the first time when Harbor starts. It has no effect after the first launch of Harbor. Change the admin password from UI after launching Harbor.
- Database Password: The password of the root user of MySQL database.
- Authentication Mode: The default authentication mode is db_auth, i.e. the credentials are stored in a local database. Set it to ldap_auth if you want to verify the user's credential against an LDAP/AD server.
- LDAP URL: The URL of an LDAP/AD server.
- LDAP Search DN: A user's DN who has the permission to search the LDAP/AD server. If your LDAP/AD server does not support anonymous search, you should configure this DN and LDAP Seach Password.
- LDAP Search Password: The password of the user for LDAP search.
- LDAP Base DN: The base DN from which to look up a user in LDAP/AD.
- LDAP UID: The attribute used in a search to match a user, it could be uid, cn, email, sAMAccountName or other attributes depending on your LDAP/AD server.
- Email Server: The mail server to send out emails to reset password.
- Email Server Port: The port of mail server.
- Email Username: The user from whom the password reset email is sent.
- Email Password: The password of the user from whom the password reset email is sent.
- Email From: The name of the email sender.
- Email SSL: Whether to enabled secure mail transmission.
- SSL Cert: Paste in the content of a certificate file. If SSL Cert and SSL Cert Key are both set, HTTPS will be used.
- SSL Cert Key: Paste in the content of certificate key file. If SSL Cert and SSL Cert Key are both set, HTTPS will be used.
- Self Registration: Determine whether the self-registration is allowed or not when the authentication mode is database. Set this to off to disable a user's self-registration in Harbor.
- Verify Remote Cert: Determine whether the image replication should verify the certificate when it connects to a remote registry via TLS. Set this flag to off when the remote registry uses a self-signed or untrusted certificate.
- Garbage Collection: When setting this to true, Harbor performs garbage collection everytime it boots up. The first time setting this flag to true needs to power off the VM and power it on again.
-
Networking properties
- Default Gateway: The default gateway address for this VM. Leave blank if DHCP is desired.
- Domain Name: The domain name of this VM. Leave blank if DHCP is desired.
- Domain Search Path: The domain search path(comma or space separated domain names) for this VM. Leave blank if DHCP is desired.
- Domain Name Servers: The domain name server IP Address for this VM(comma separated). Leave blank if DHCP is desired.
- Network 1 IP Adress: The IP address of this interface. Leave blank if DHCP is desired.
- Network 1 Netmask: The netmask or prefix for this interface. Leave blank if DHCP is desired.
Notes: If you want to enable HTTPS with a self-signed certificate, refer to the "Getting a certificate" part of this guide for generating a certificate.
After you complete the properties, click "Next".
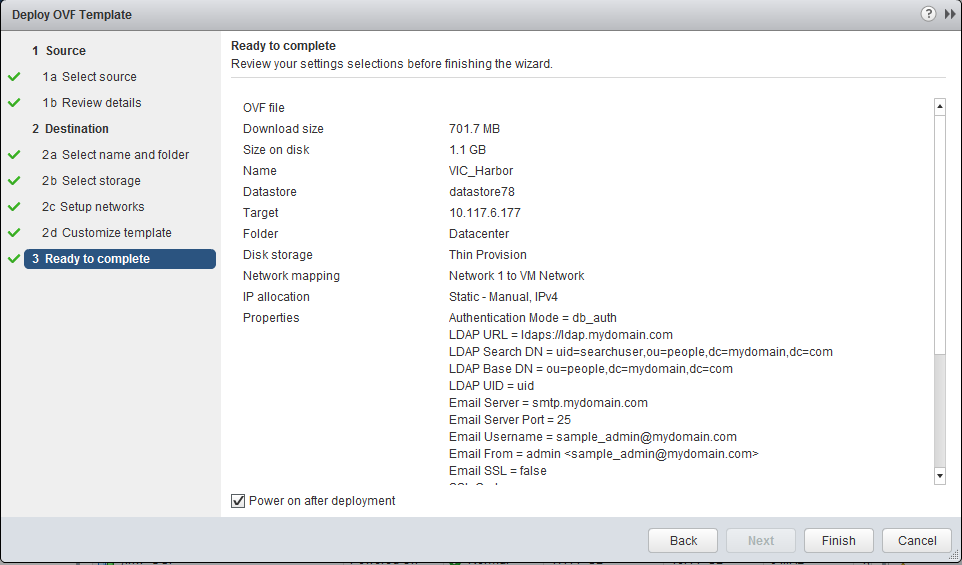
- Review your settings and click "Finish" to complete the deployment.
-
Power on the virtual appliance. It may take a few minutes for the first bootup. The virtual appliance needs to initialize itself for configuration like netowrk address and password.
-
When the appliance is ready, check from vSphere Web Client for its IP address. Open a browser and type in the URL
http(s)://harbor_ip_addressorhttp(s)://harbor_host_name. Log in as the admin user and verify Harbor has been successfully installed.
Reconfiguration
If you want to change the properties of Harbor, follow the below steps:
- Power off Harbor's virtual appliance.
- Right click on the VM and select "Edit Settings".
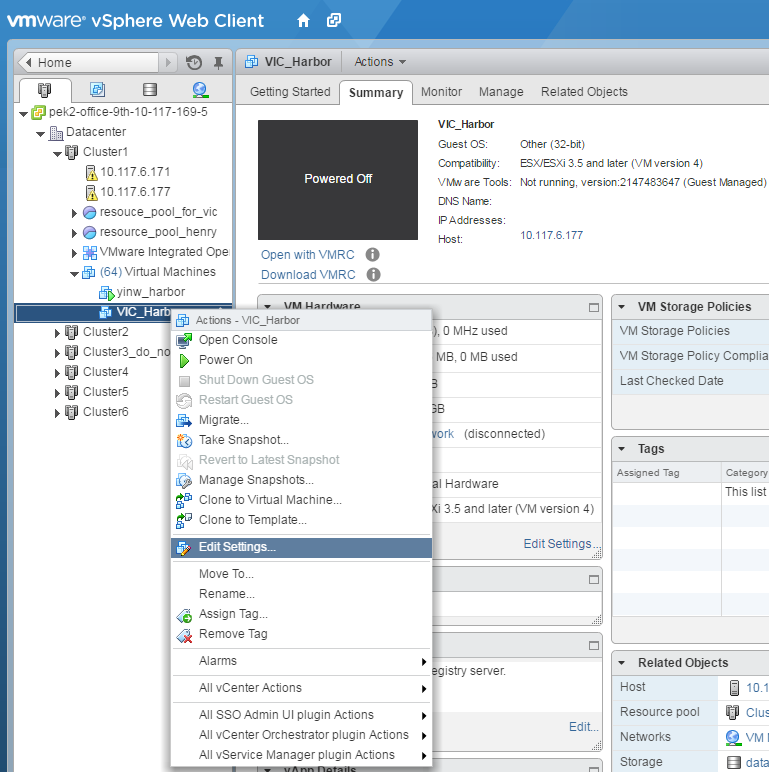
- Click the "vApp Options" tab, update the properties and click "OK".
- Power on the VM.
Note: The initial admin password, root password of the virtual appliance, MySql root password, and all networking properties can not be modified using this method after Harbor's first launch. The password of the admin user should be changed in the admin portal. The root password of virtual appliance, as well as the networking settings, can be changed by logging in the virtural appliance and doing it in the Linux operating system.