21 KiB
User Guide
Overview
This guide walks you through the fundamentals of using Harbor. You'll learn how to use Harbor to:
- Manage your projects.
- Manage members of a project.
- Replicate projects to a remote registry.
- Search projects and repositories.
- Manage Harbor system if you are the system administrator:
- Manage users.
- Manage destinations.
- Manage replication policies.
- Manage configuration.
- Pull and push images using Docker client.
- Delete repositories and images.
- Content trust.
- Vulnerability scanning via Clair.
- Pull image from Harbor in Kubernetes.
Role Based Access Control(RBAC)
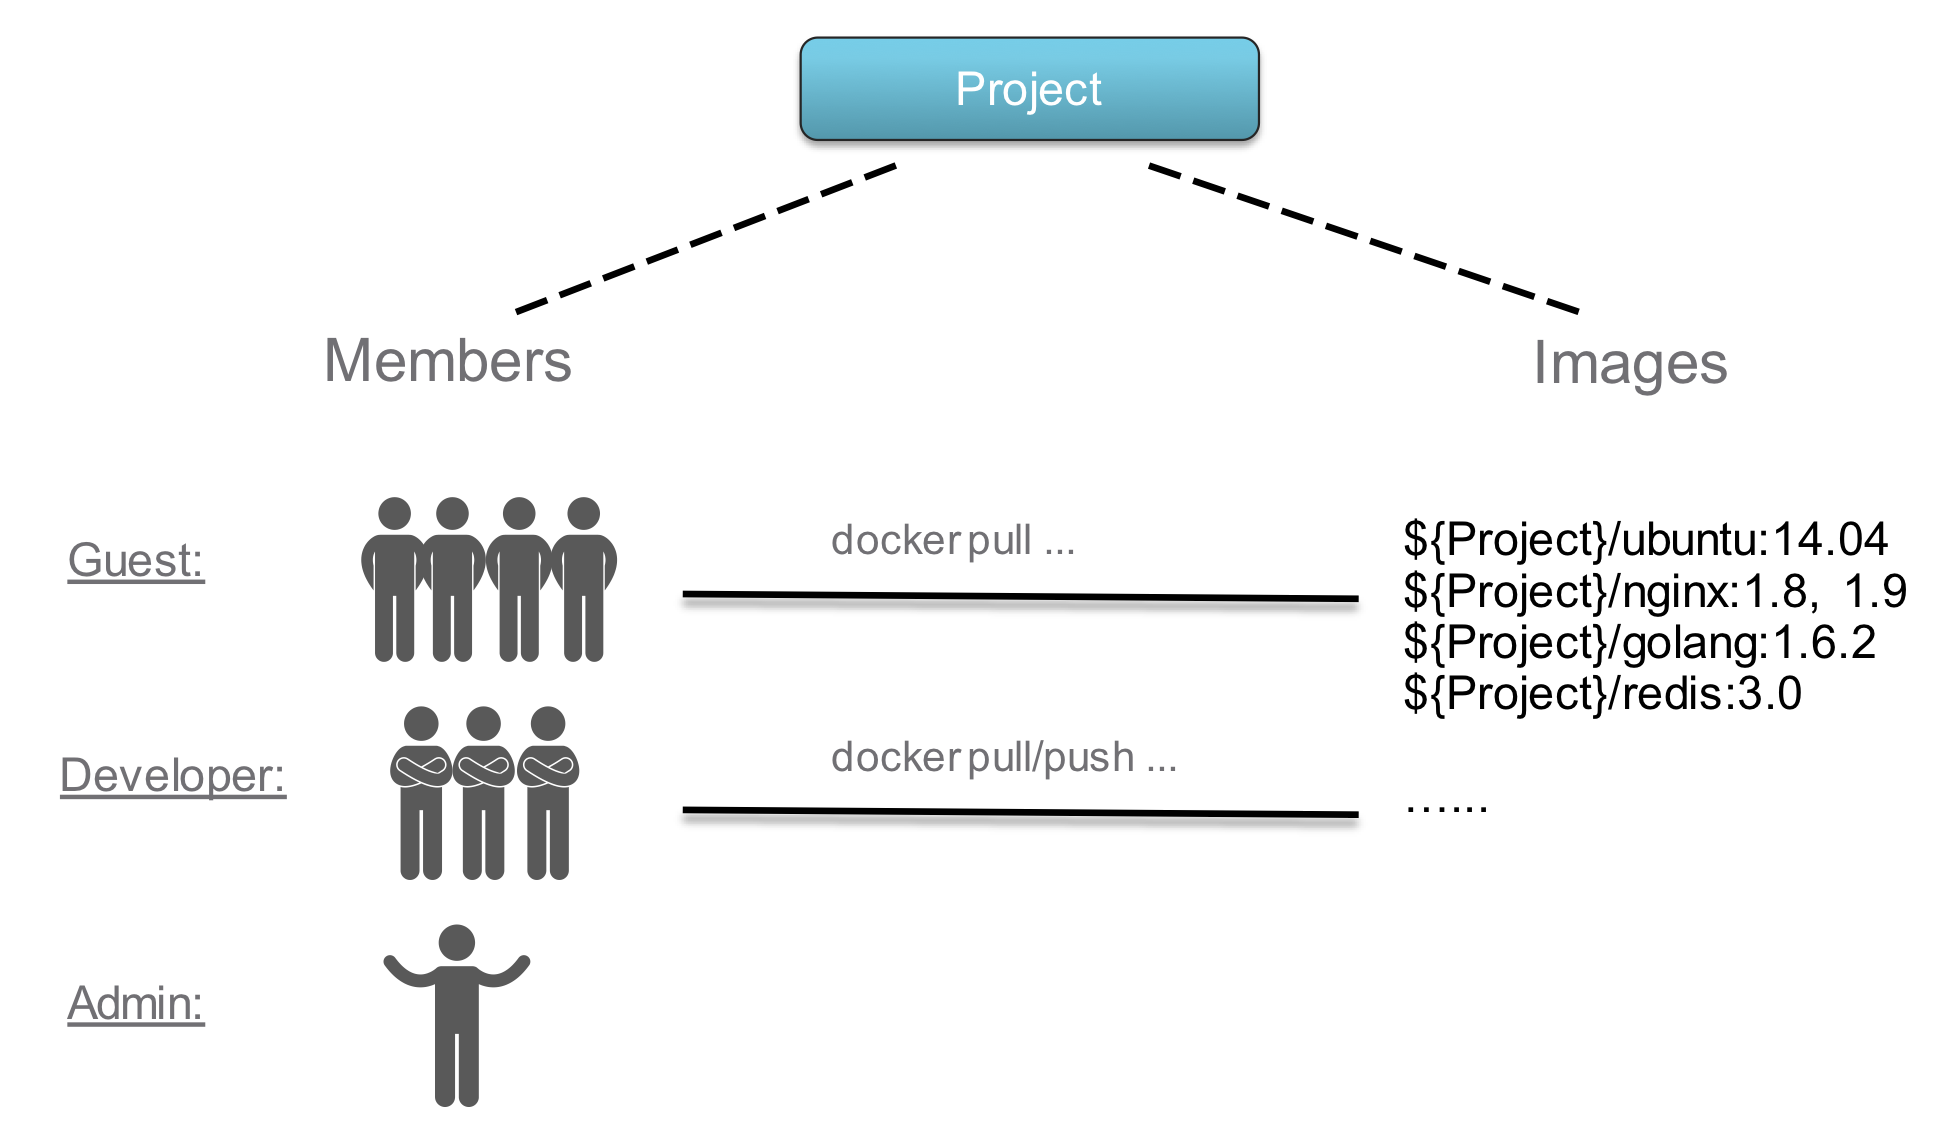
Harbor manages images through projects. Users can be added into one project as a member with three different roles:
- Guest: Guest has read-only privilege for a specified project.
- Developer: Developer has read and write privileges for a project.
- ProjectAdmin: When creating a new project, you will be assigned the "ProjectAdmin" role to the project. Besides read-write privileges, the "ProjectAdmin" also has some management privileges, such as adding and removing members, starting a vulnerability scan.
Besides the above three roles, there are two system-wide roles:
- SysAdmin: "SysAdmin" has the most privileges. In addition to the privileges mentioned above, "SysAdmin" can also list all projects, set an ordinary user as administrator, delete users and set vulnerability scan policy for all images. The public project "library" is also owned by the administrator.
- Anonymous: When a user is not logged in, the user is considered as an "Anonymous" user. An anonymous user has no access to private projects and has read-only access to public projects.
Video demo:  youtube , Tencent Video
User account
Harbor supports two authentication modes:
-
Database(db_auth)
Users are stored in the local database.
A user can register himself/herself in Harbor in this mode. To disable user self-registration, refer to the installation guide for initial configuration, or disable this feature in Administrator Options. When self-registration is disabled, the system administrator can add users into Harbor.
When registering or adding a new user, the username and email must be unique in the Harbor system. The password must contain at least 8 characters with 1 lowercase letter, 1 uppercase letter and 1 numeric character.
When you forgot your password, you can follow the below steps to reset the password:
- Click the link "Forgot Password" in the sign in page.
- Input the email address entered when you signed up, an email will be sent out to you for password reset.
- After receiving the email, click on the link in the email which directs you to a password reset web page.
- Input your new password and click "Save".
-
LDAP/Active Directory (ldap_auth)
Under this authentication mode, users whose credentials are stored in an external LDAP or AD server can log in to Harbor directly.
When an LDAP/AD user logs in by username and password, Harbor binds to the LDAP/AD server with the "LDAP Search DN" and "LDAP Search Password" described in installation guide. If it succeeded, Harbor looks up the user under the LDAP entry "LDAP Base DN" including substree. The attribute (such as uid, cn) specified by "LDAP UID" is used to match a user with the username. If a match is found, the user's password is verified by a bind request to the LDAP/AD server.
Self-registration, changing password and resetting password are not supported under LDAP/AD authentication mode because the users are managed by LDAP or AD.
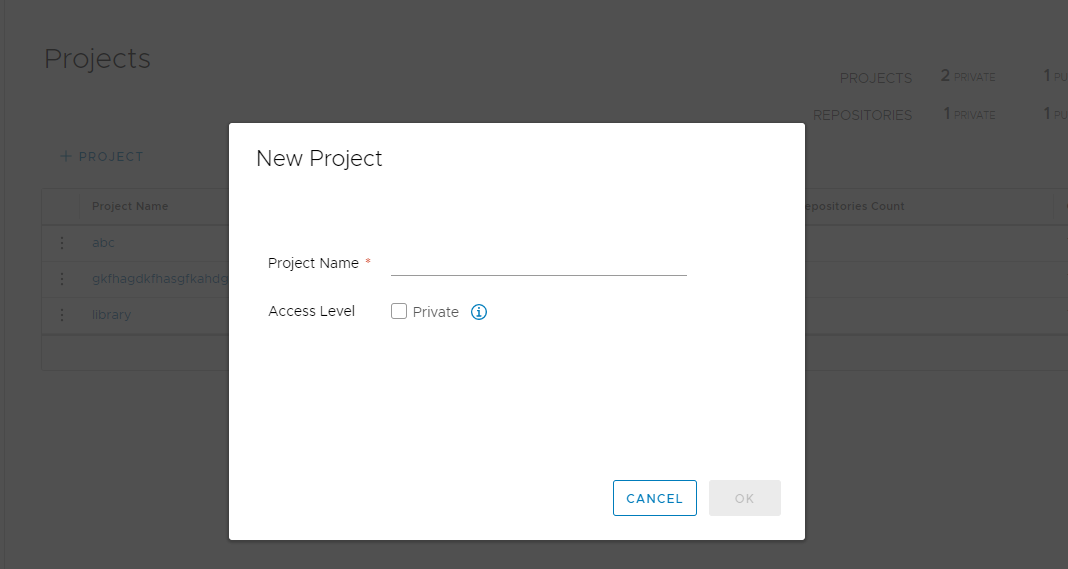
Managing projects
A project in Harbor contains all repositories of an application. No images can be pushed to Harbor before the project is created. RBAC is applied to a project. There are two types of projects in Harbor:
- Public: All users have the read privilege to a public project, it's convenient for you to share some repositories with others in this way.
- Private: A private project can only be accessed by users with proper privileges.
You can create a project after you signed in. Check on the "Access Level" checkbox will make this project public.
After the project is created, you can browse repositories, users and logs using the navigation tab.
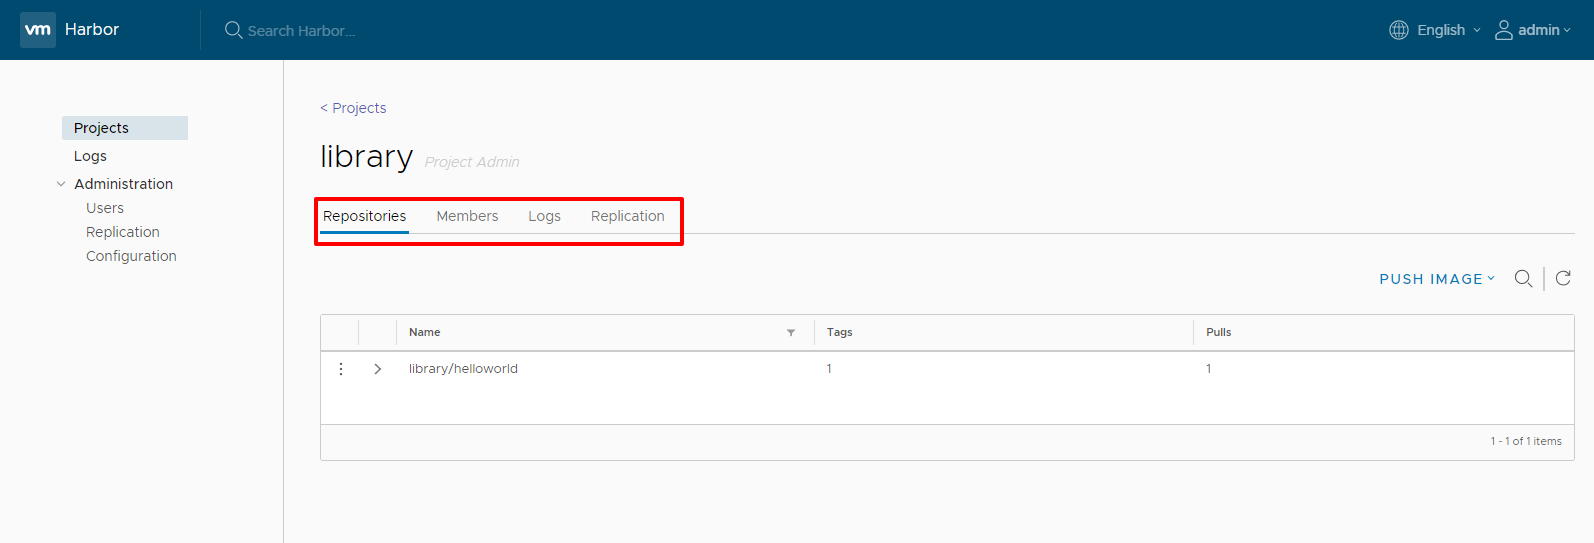
All logs can be listed by clicking "Logs". You can apply a filter by username, or operations and dates under "Advanced Search".

Managing members of a project
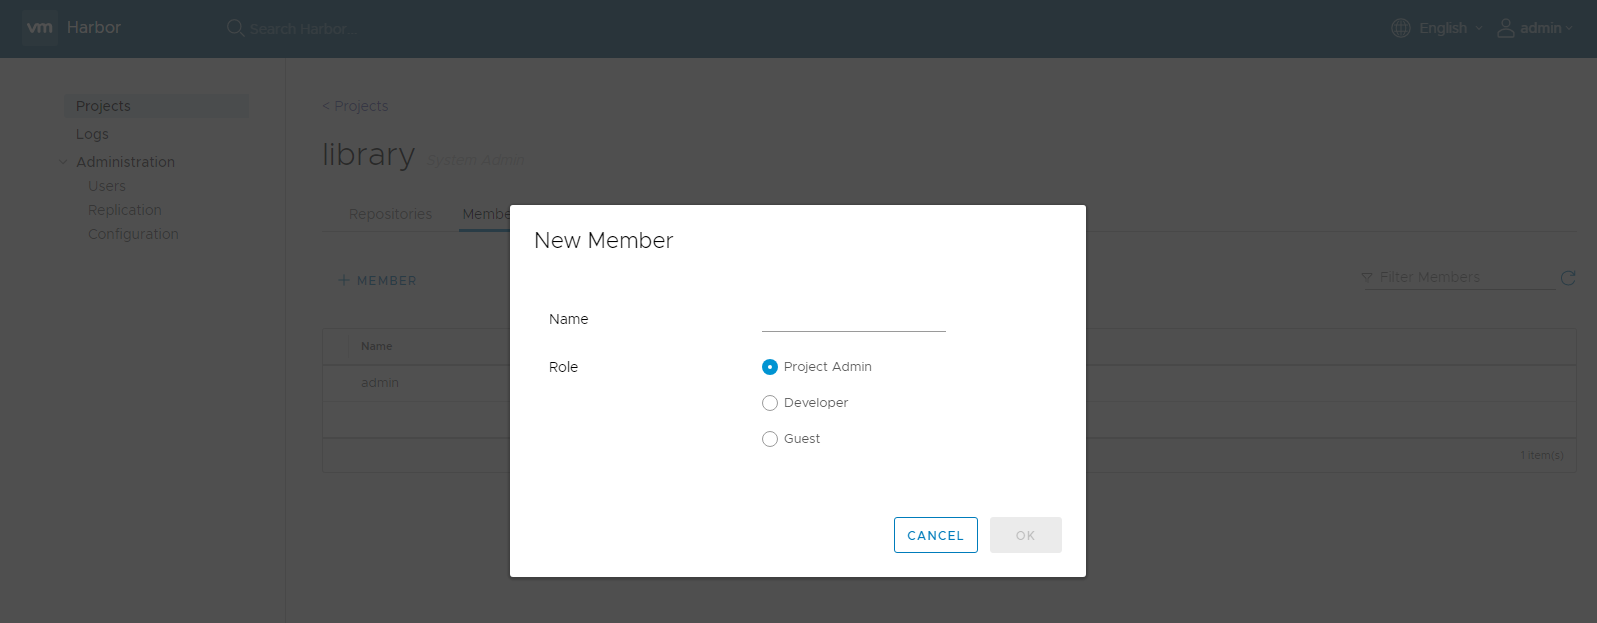
Adding members
You can add members with different roles to an existing project.
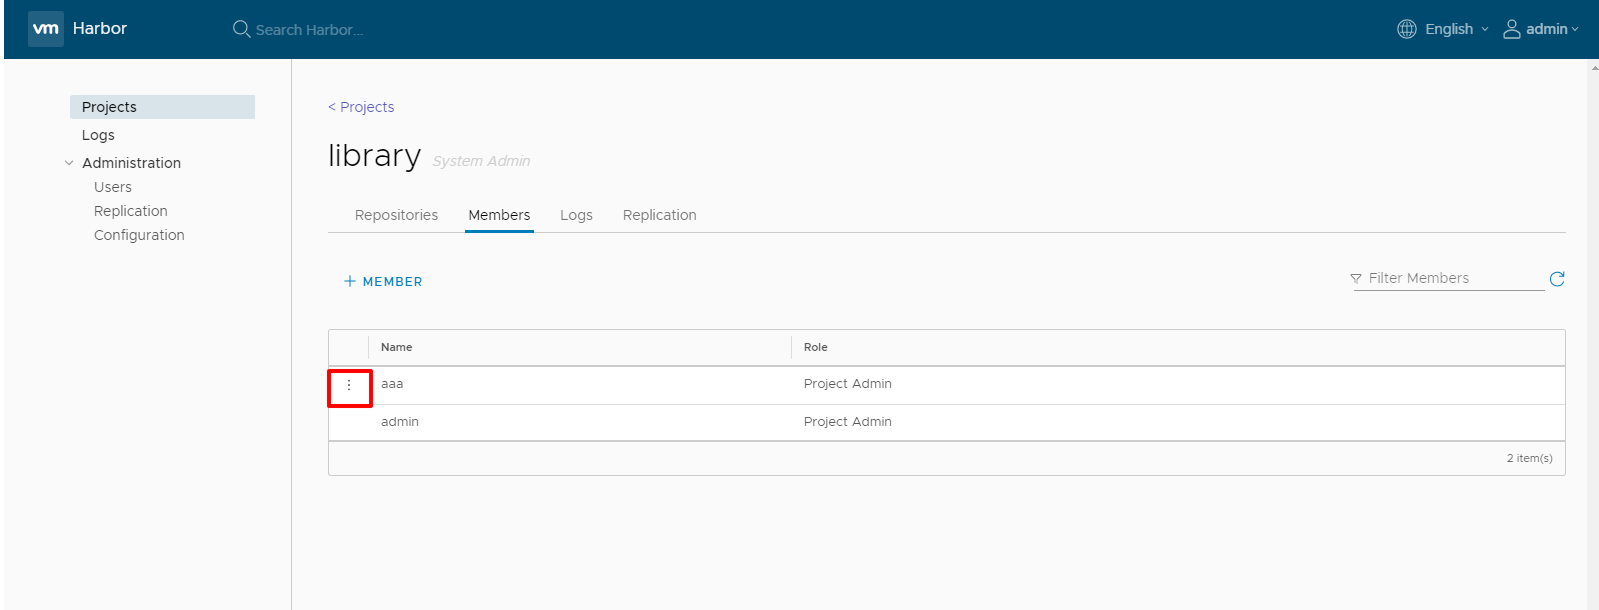
Updating and removing members
You can update or remove a member by clicking the icon on the left.
Replicating images
Images replication is used to replicate repositories from one Harbor instance to another.
The function is project-oriented, and once the system administrator set a rule to one project, all repositories under the project will be replicated to the remote registry. Each repository will start a job to run. If the project does not exist on the remote registry, a new project will be created automatically, but if it already exists and the user configured in policy has no write privilege to it, the process will fail. When a new repository is pushed to this project or an existing repository is deleted from this project, the same operation will also be replicated to the destination. The member information will not be replicated.
There may be a bit of delay during replication according to the situation of the network. If replication job fails due to the network issue, the job will be re-scheduled a few minutes later.
Note: The replication feature is incompatible between Harbor instance before version 0.3.5(included) and after version 0.3.5.
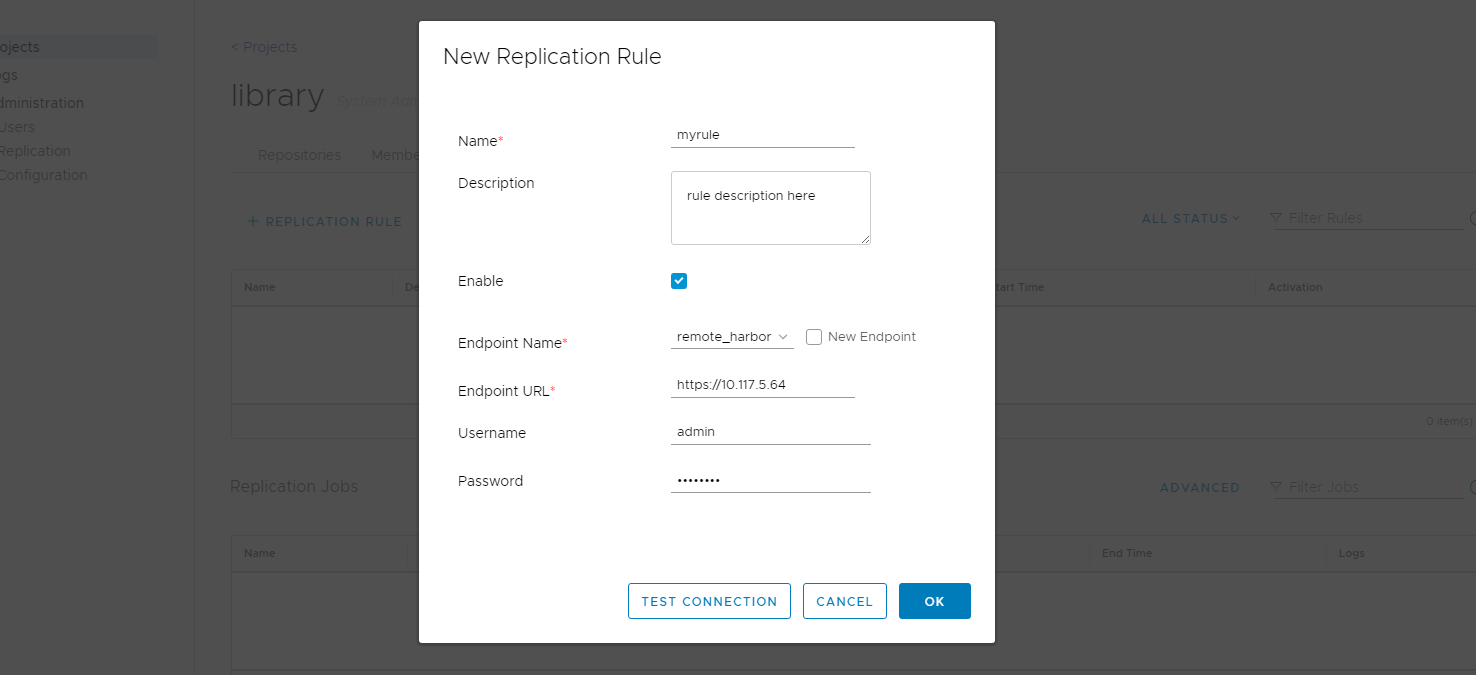
Start replication by creating a rule. Click "Add Replication Rule" on the "Replication" tab, fill in the necessary fields, if there is no endpoint in the list, you need to create one, and then click "OK", a rule for this project will be created. If "Enable" is chosen, the project will be replicated to the remote immediately.
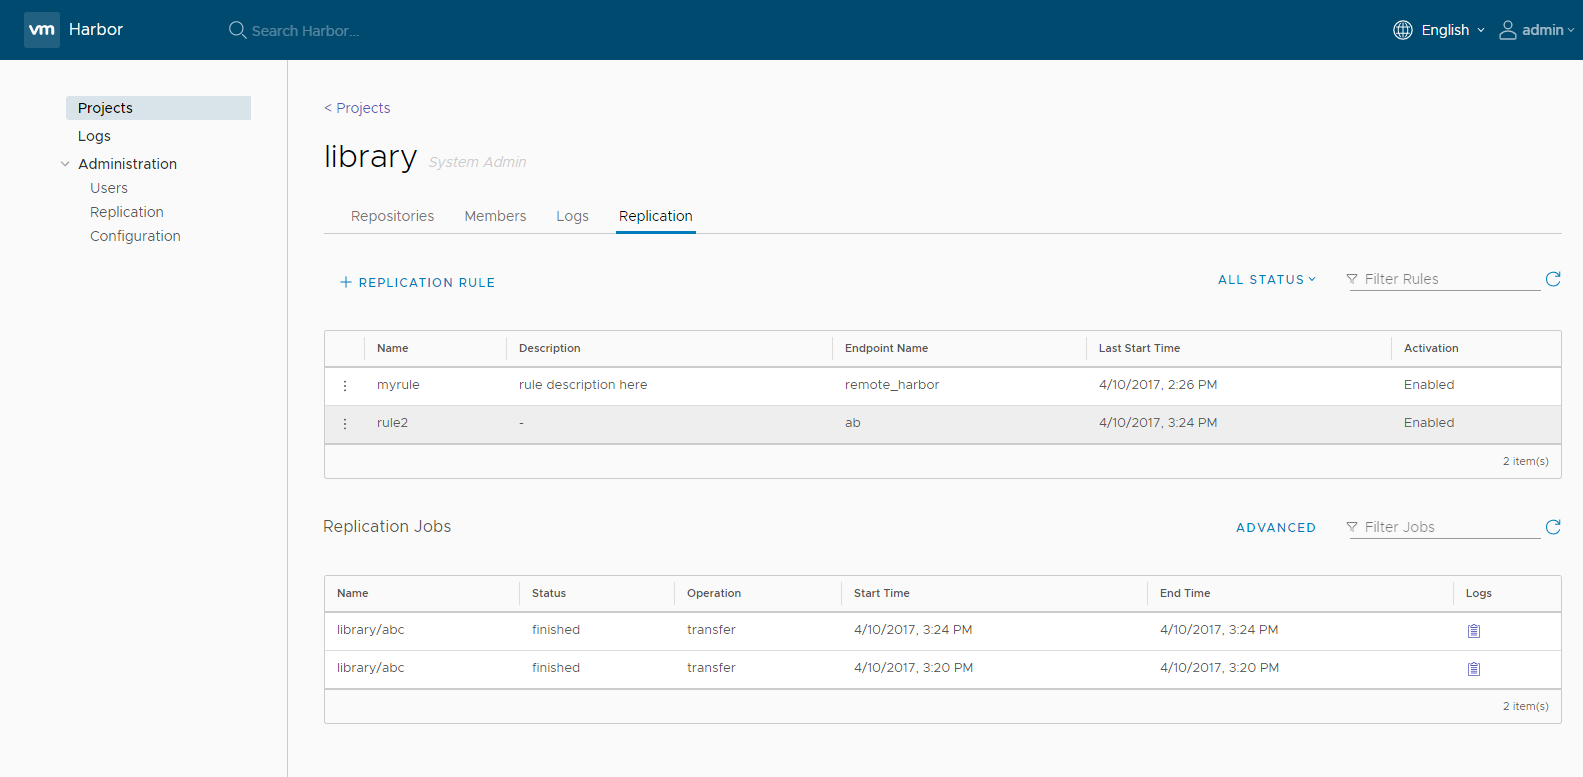
You can enable, disable or delete a rule in the rule list view. Only rules which are disabled can be edited and only rules which are disabled and have no running jobs can be deleted. If a rule is disabled, the running jobs under it will be stopped.
Click a rule, jobs which belong to this rule will be listed. A job represents the progress of replicating the repository to the remote instance.
Video demo:  youtube , Tencent Video
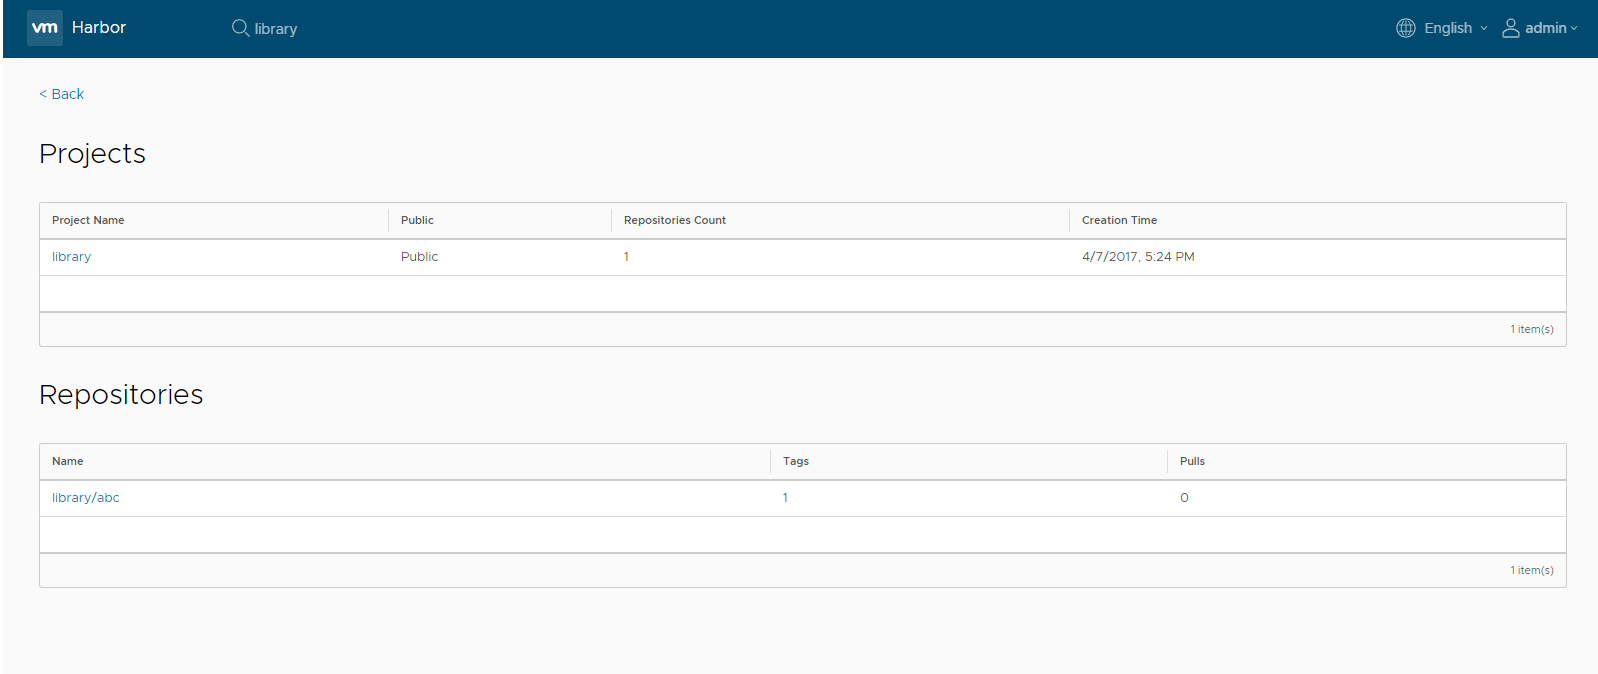
Searching projects and repositories
Entering a keyword in the search field at the top lists all matching projects and repositories. The search result includes both public and private repositories you have access to.
Administrator options
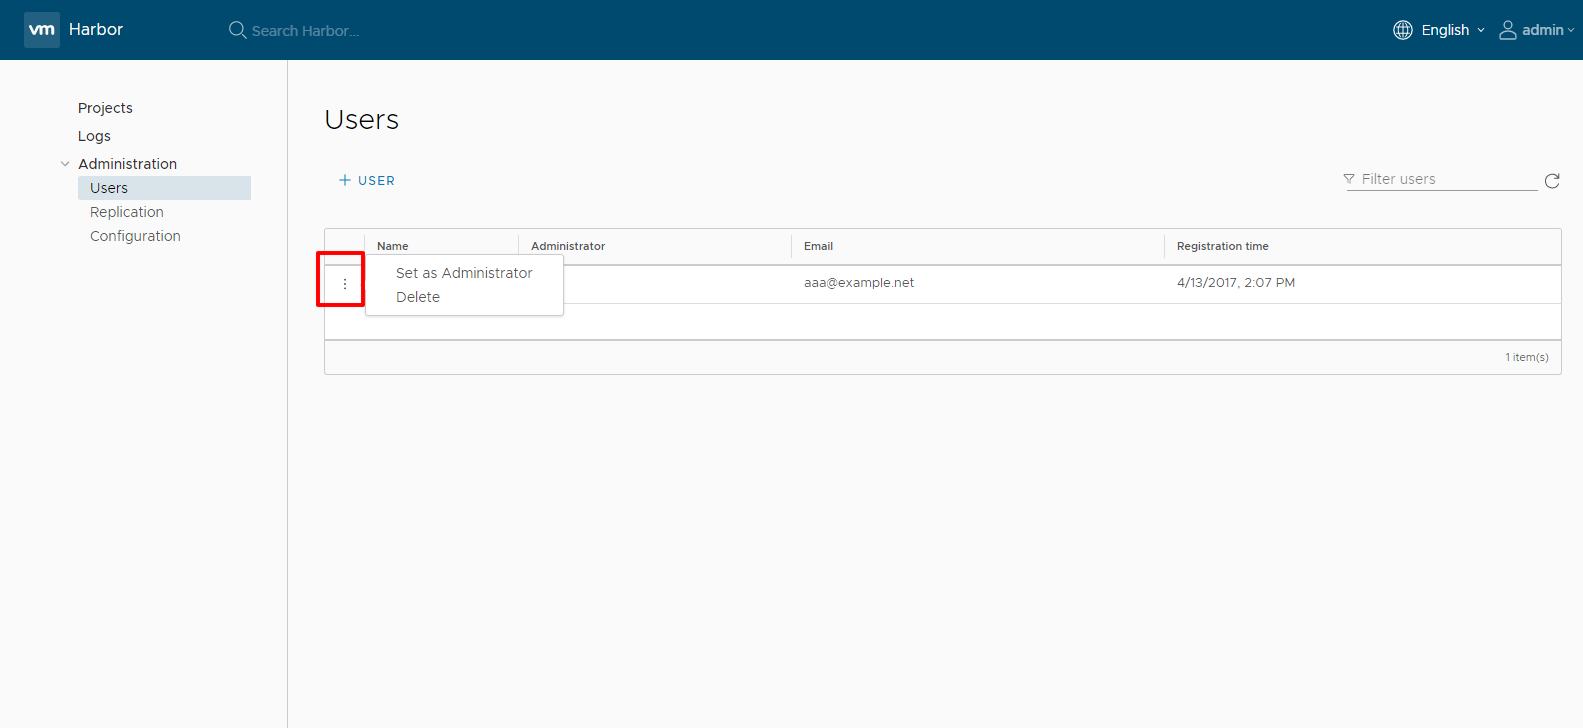
Managing user
Administrator can add "Administrator" role to an ordinary user by click button on the left and select "Set as Administrator". To delete a user, select "Delete".
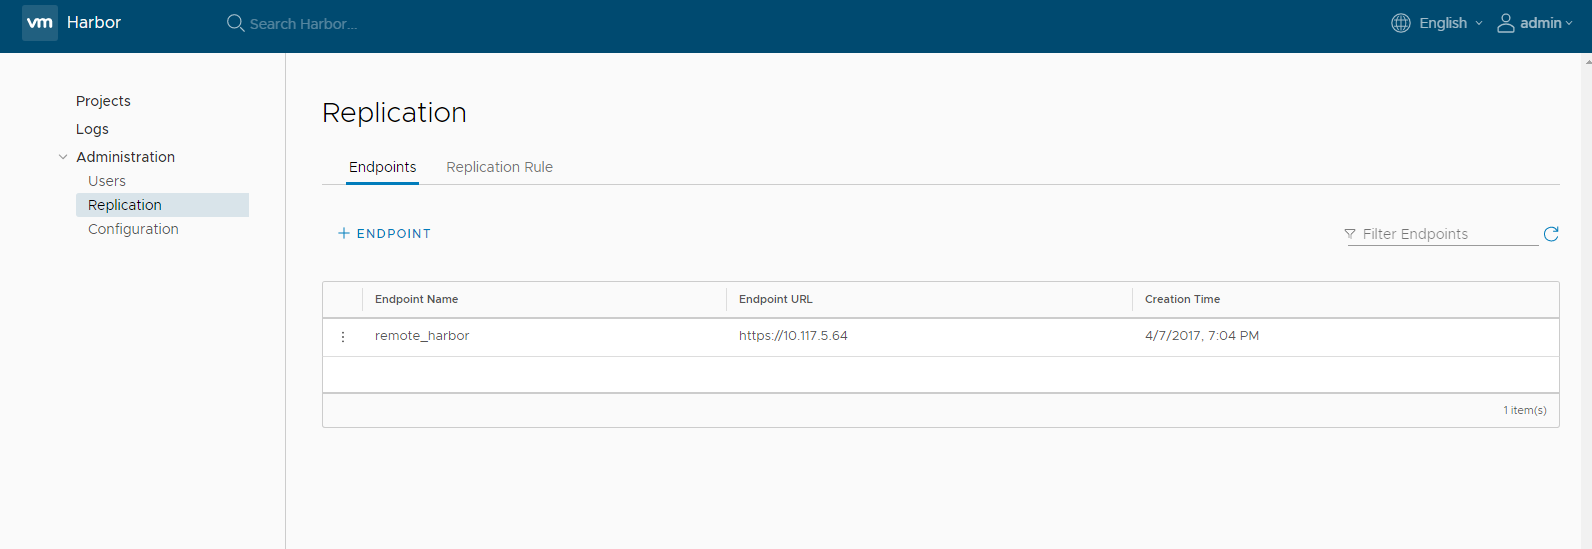
Managing endpoint
You can list, add, edit and delete endpoints in the "Endpoints" tab. Only endpoints which are not referenced by any enabled rules can be edited.
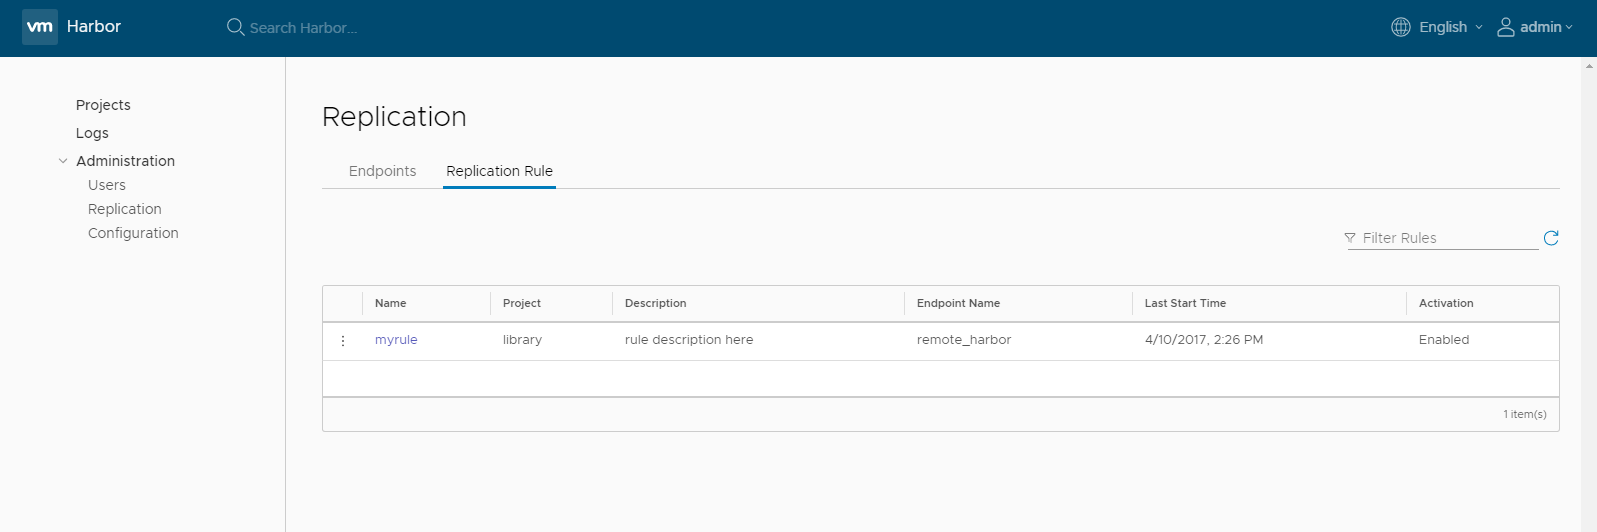
Managing replication
You can list, edit, enable and disable rules in the "Replication" tab. Make sure the policy is disabled before you edit it.
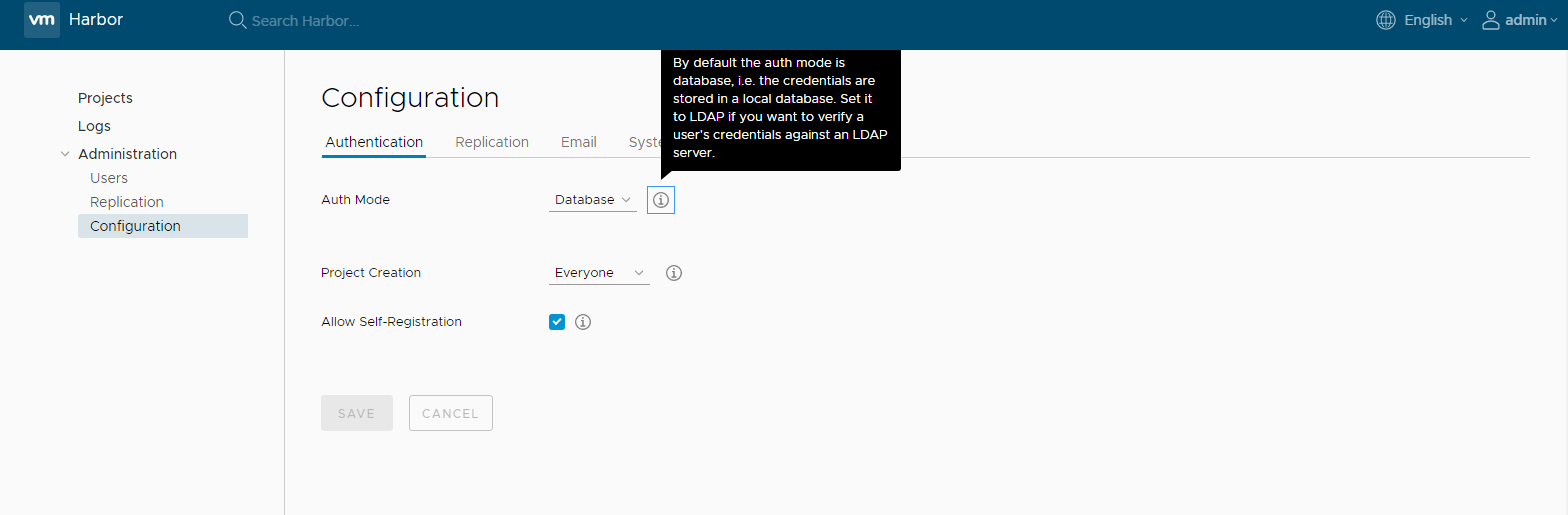
Managing authentication
You can change authentication mode between Database(default) and LDAP before any user is added, when there is at least one user(besides admin) in Harbor, you cannot change the authentication mode.
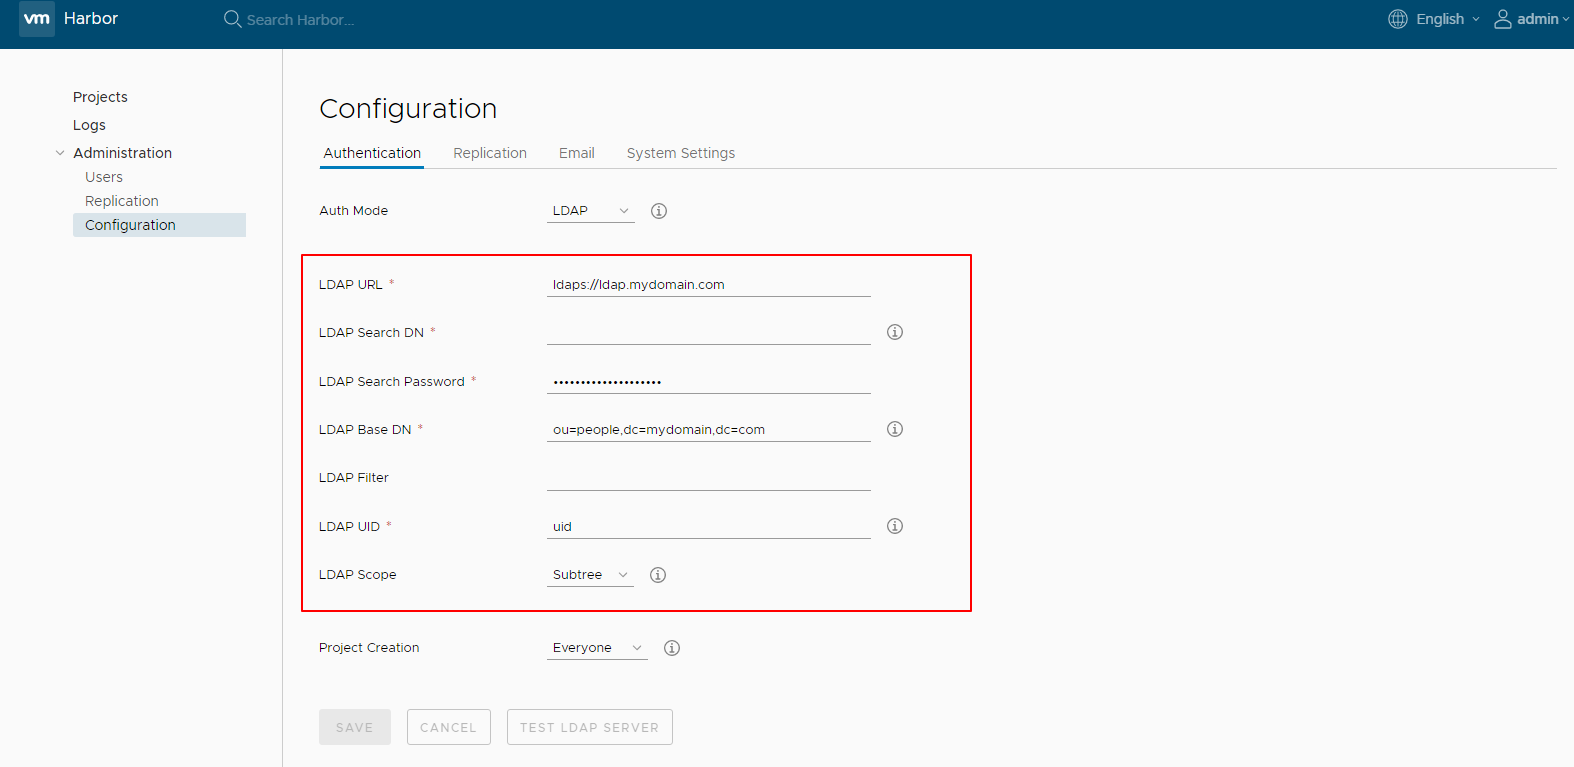
 When using LDAP mode, user's self-registration is disabled. The parameters of LDAP server must be filled in. For more information, refer to User account.
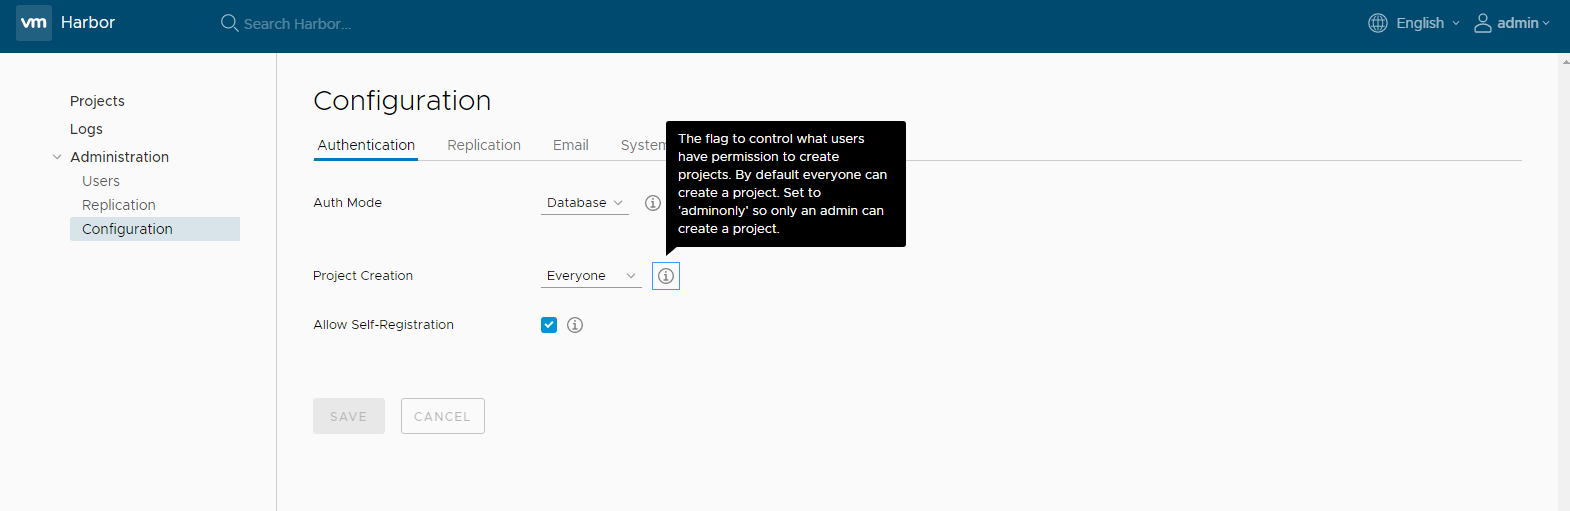
Managing project creation
Use the Project Creation drop-down menu to set which users can create projects. Select Everyone to allow all users to create projects. Select Admin Only to allow only users with the Administrator role to create projects.
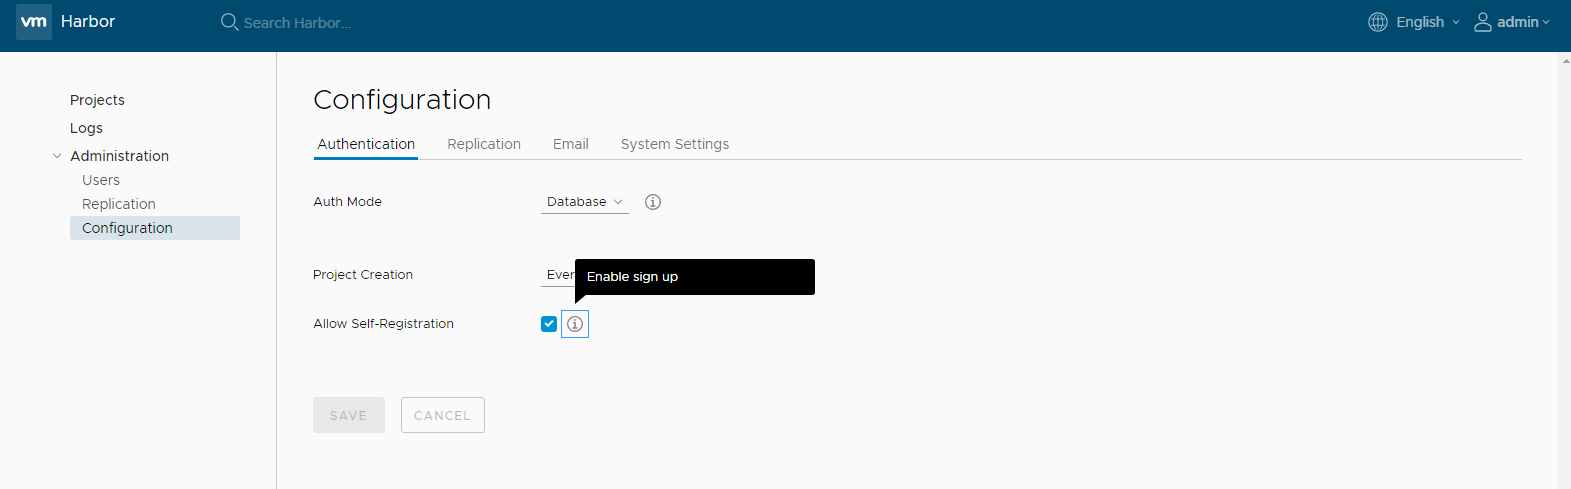
Managing self-registration
You can manage whether a user can sign up for a new account. This option is not available if you use LDAP authentication.
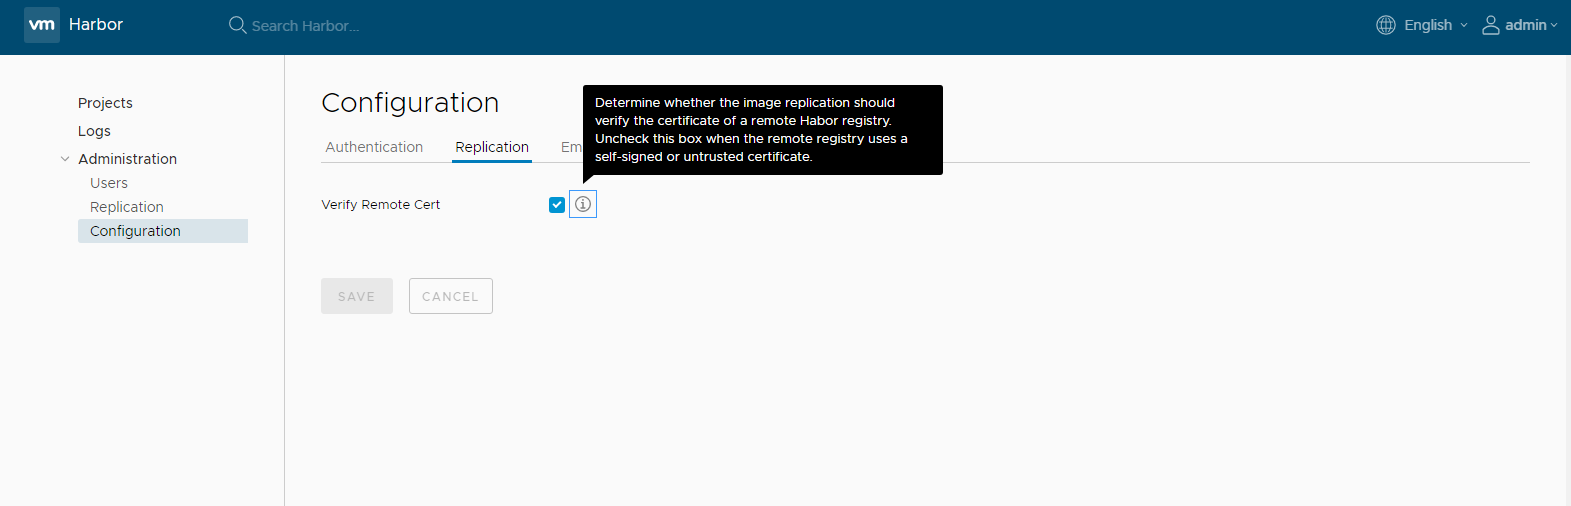
Managing verification of remote certificate
You can choose whether to verify remote endpoint's certification. You may need to disable certificate verification if the remote registry uses a self-signed or an untrusted certificate.
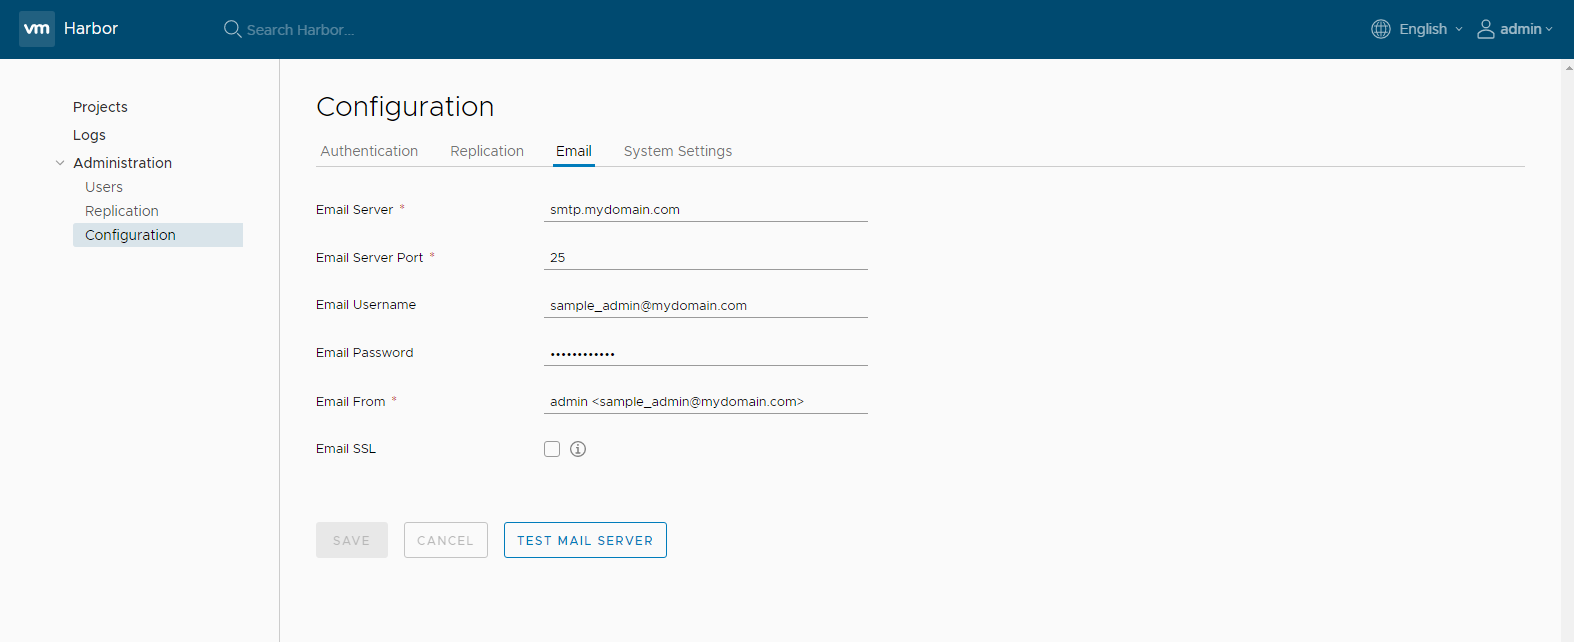
Managing email settings
You can change Harbor's email settings, the mail server is used to send out responses to users who request to reset their password.
Pulling and pushing images using Docker client
NOTE: Harbor only supports Registry V2 API. You need to use Docker client 1.6.0 or higher.
Harbor supports HTTP by default and Docker client tries to connect to Harbor using HTTPS first, so if you encounter an error as below when you pull or push images, you need to add '--insecure-registry' option to /etc/default/docker (ubuntu) or /etc/sysconfig/docker (centos) and restart Docker:
Error response from daemon: Get https://myregistrydomain.com/v1/users/: dial tcp myregistrydomain.com:443 getsockopt: connection refused.
If this private registry supports only HTTP or HTTPS with an unknown CA certificate, please add
--insecure-registry myregistrydomain.com to the daemon's start up arguments.
In the case of HTTPS, if you have access to the registry's CA certificate, simply place the CA certificate at /etc/docker/certs.d/myregistrydomain.com/ca.crt .
Pulling images
If the project that the image belongs to is private, you should sign in first:
$ docker login 10.117.169.182
You can now pull the image:
$ docker pull 10.117.169.182/library/ubuntu:14.04
Note: Replace "10.117.169.182" with the IP address or domain name of your Harbor node. You cannot pull a unsigned image if you enabled content trust.
Pushing images
Before pushing an image, you must create a corresponding project on Harbor web UI.
First, log in from Docker client:
$ docker login 10.117.169.182
Tag the image:
$ docker tag ubuntu:14.04 10.117.169.182/demo/ubuntu:14.04
Push the image:
$ docker push 10.117.169.182/demo/ubuntu:14.04
Note: Replace "10.117.169.182" with the IP address or domain name of your Harbor node.
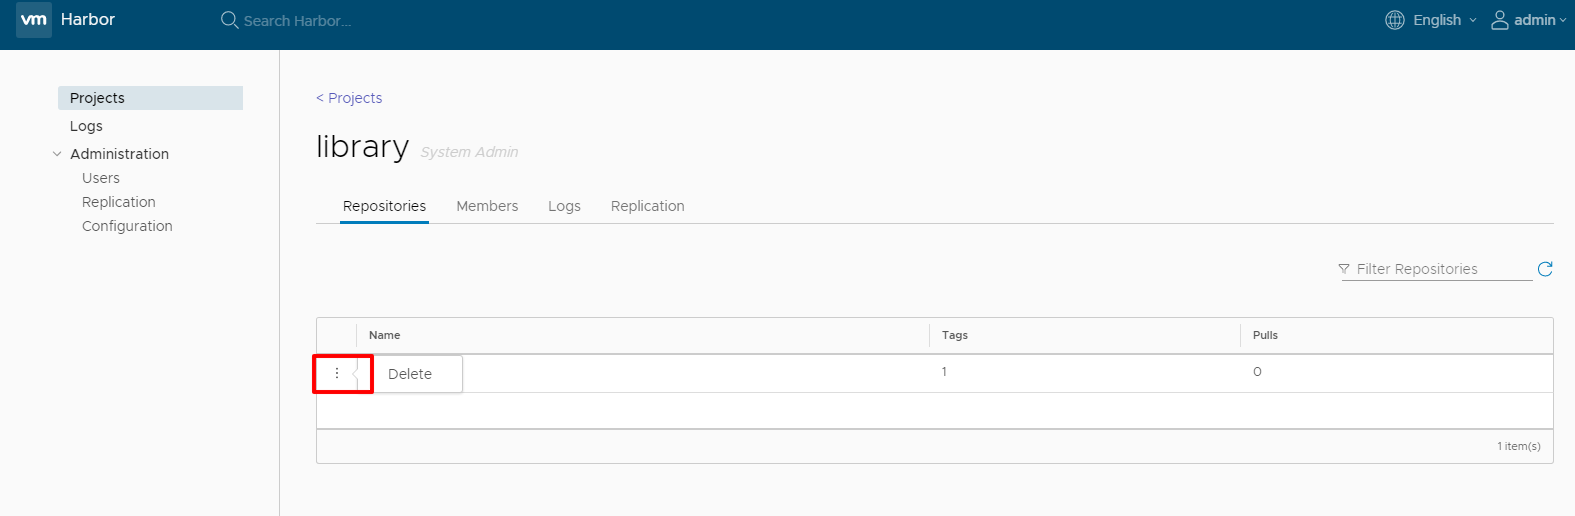
Deleting repositories
Repository deletion runs in two steps.
First, delete a repository in Harbor's UI. This is soft deletion. You can delete the entire repository or just a tag of it. After the soft deletion, the repository is no longer managed in Harbor, however, the files of the repository still remain in Harbor's storage.
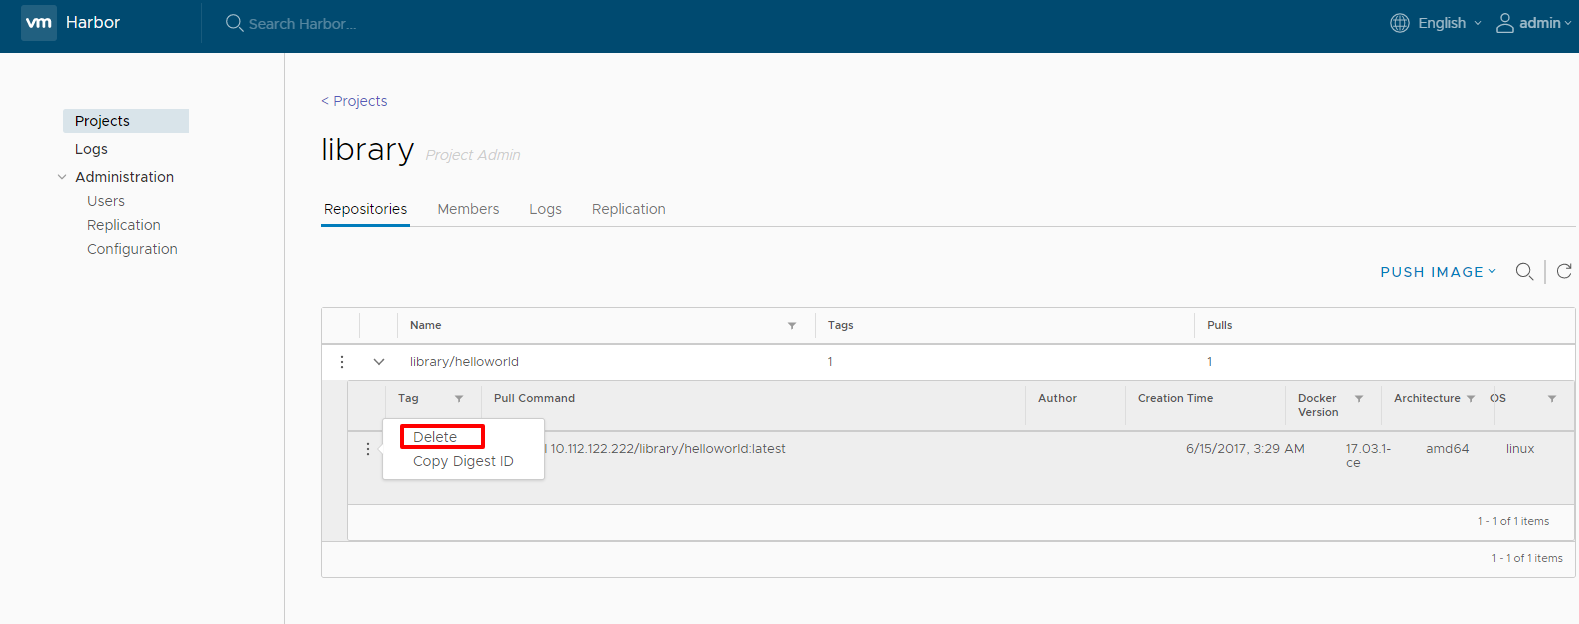
CAUTION: If both tag A and tag B refer to the same image, after deleting tag A, B will also get deleted. if you enabled content trust, you need to use notary command line tool to delete the tag's signature before you delete an image.
Next, delete the actual files of the repository using the registry's garbage collection(GC). Make sure that no one is pushing images or Harbor is not running at all before you perform a GC. If someone were pushing an image while GC is running, there is a risk that the image's layers will be mistakenly deleted which results in a corrupted image. So before running GC, a preferred approach is to stop Harbor first.
Run the below commands on the host which Harbor is deployed on to preview what files/images will be affected:
$ docker-compose stop

$ docker run -it --name gc --rm --volumes-from registry vmware/registry:2.6.2-photon garbage-collect --dry-run /etc/registry/config.yml
NOTE: The above option "--dry-run" will print the progress without removing any data.
Verify the result of the above test, then use the below commands to perform garbage collection and restart Harbor.
$ docker run -it --name gc --rm --volumes-from registry vmware/registry:2.6.2-photon garbage-collect  /etc/registry/config.yml

$ docker-compose start
For more information about GC, please see GC.
Content trust
NOTE: Notary is an optional component, please make sure you have already installed it in your Harbor instance before you go through this section.
If you want to enable content trust to ensure that images are signed, please set two environment variables in the command line before pushing or pulling any image:
export DOCKER_CONTENT_TRUST=1
export DOCKER_CONTENT_TRUST_SERVER=https://10.117.169.182:4443
If you push the image for the first time, You will be asked to enter the root key passphrase. This will be needed every time you push a new image while the DOCKER_CONTENT_TRUST flag is set.
The root key is generated at: /root/.docker/trust/private/root_keys
You will also be asked to enter a new passphrase for the image. This is generated at /root/.docker/trust/private/tuf_keys/[registry name] /[imagepath].
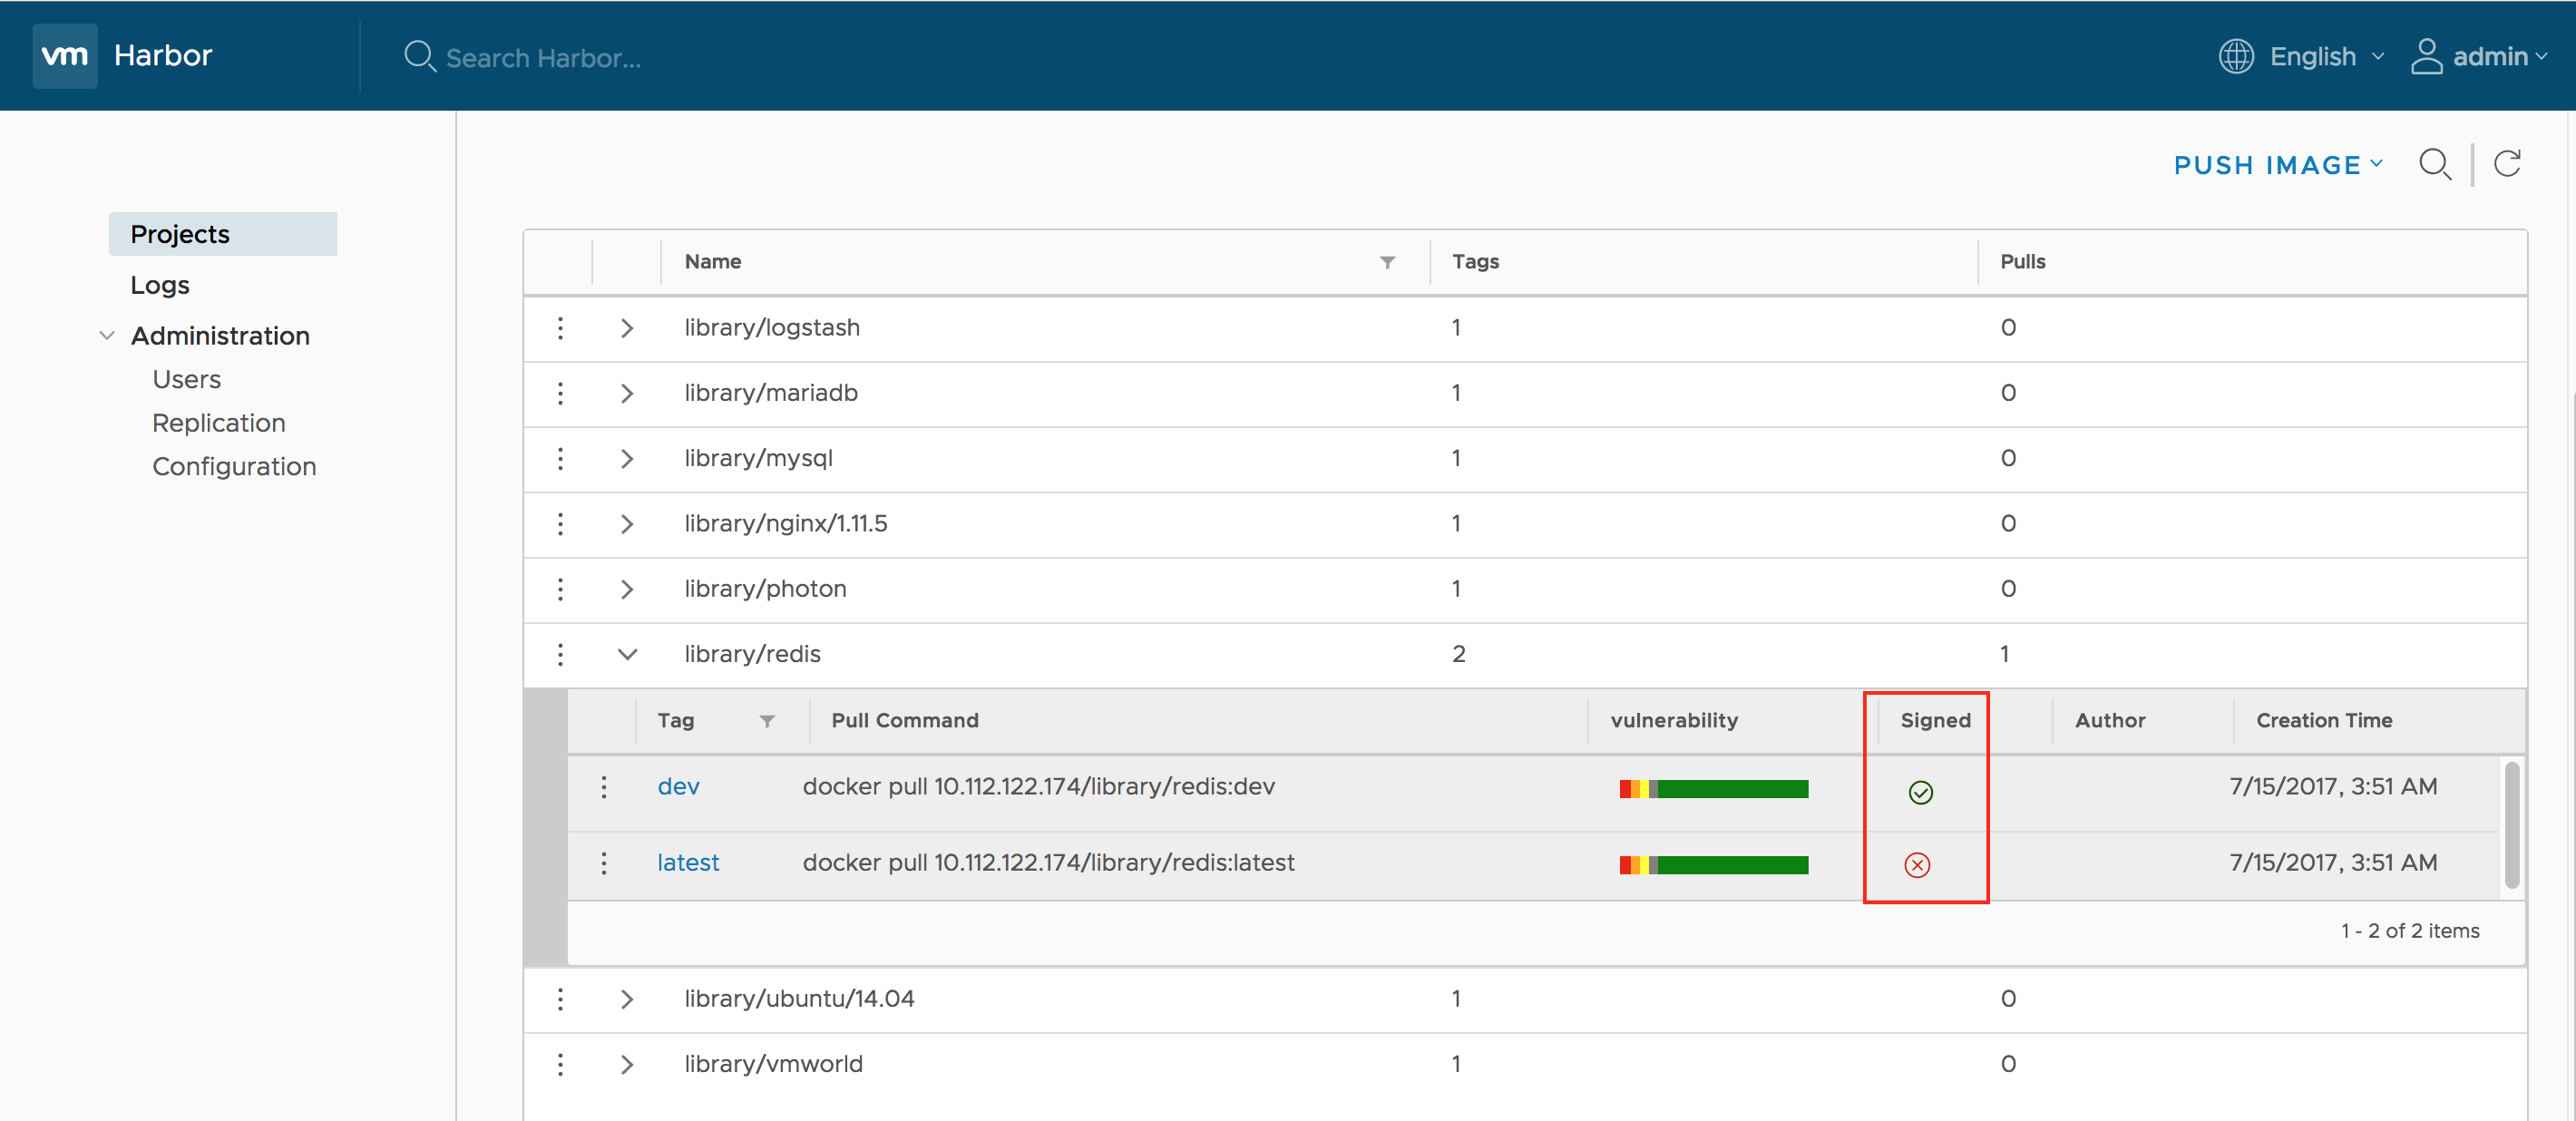
If you are using a self-signed cert, make sure to copy the CA cert into /etc/docker/certs.d/10.117.169.182 and $HOME/.docker/tls/10.117.169.182:4443/. When an image is signed, it is indicated in the Web UI.
Note: Replace "10.117.169.182" with the IP address or domain name of your Harbor node. In order to use content trust, HTTPS must be enabled in Harbor.
When an image is signed, it has a tick shown in UI; otherwise, a cross sign(X) is displayed instead.
Video demo:  youtube , Tencent Video
Vulnerability scanning via Clair
CAUTION: Clair is an optional component, please make sure you have already installed it in your Harbor instance before you go through this section.
Static analysis of vulnerabilities is provided through open source project Clair. You can initiate scanning on a particular image, or on all images in Harbor. Additionally, you can also set a policy to scan all the images at a specified time everyday.
Vulnerability metadata
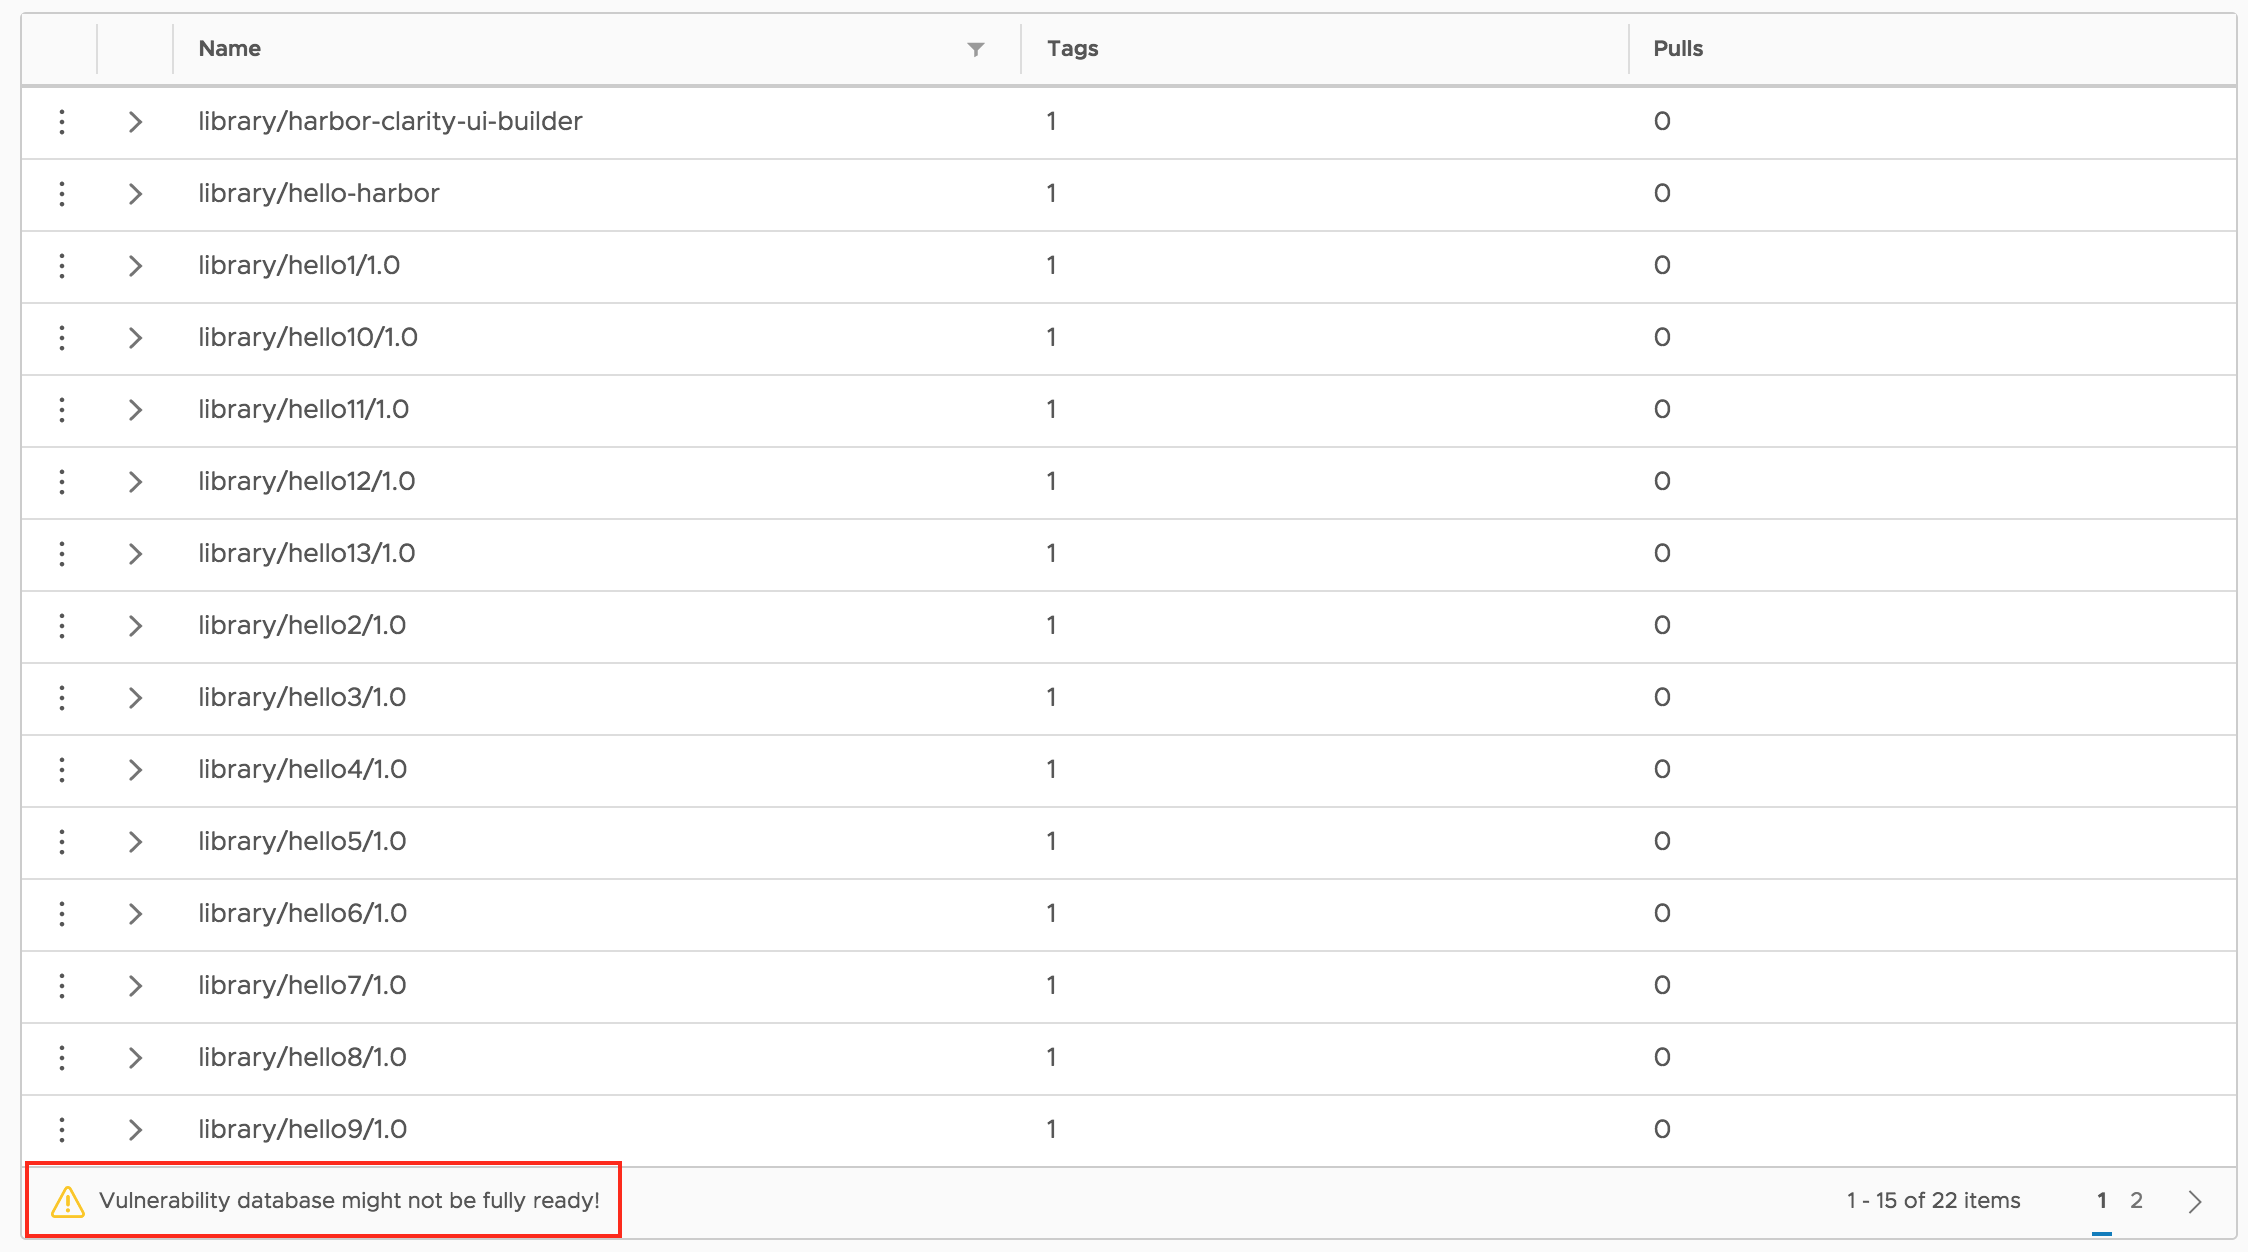
Clair depends on the vulnerability metadata to complete the analysis process. After the first initial installation, Clair will automatically start to update the metadata database from different vulnerability repositories. The updating process may take a while based on the data size and network connection. If the database has not been fully populated, there is a warning message at the footer of the repository datagrid view.
The 'database not fully ready' warning message is also displayed in the 'Vulnerability' tab of 'Configuration' section under 'Administration' for your awareness.
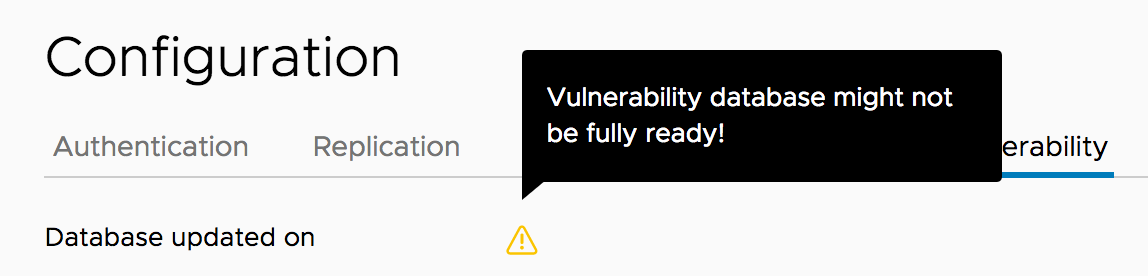
Once the database is ready, an overall database updated timestamp will be shown in the 'Vulnerability' tab of 'Configuration' section under 'Administration'.

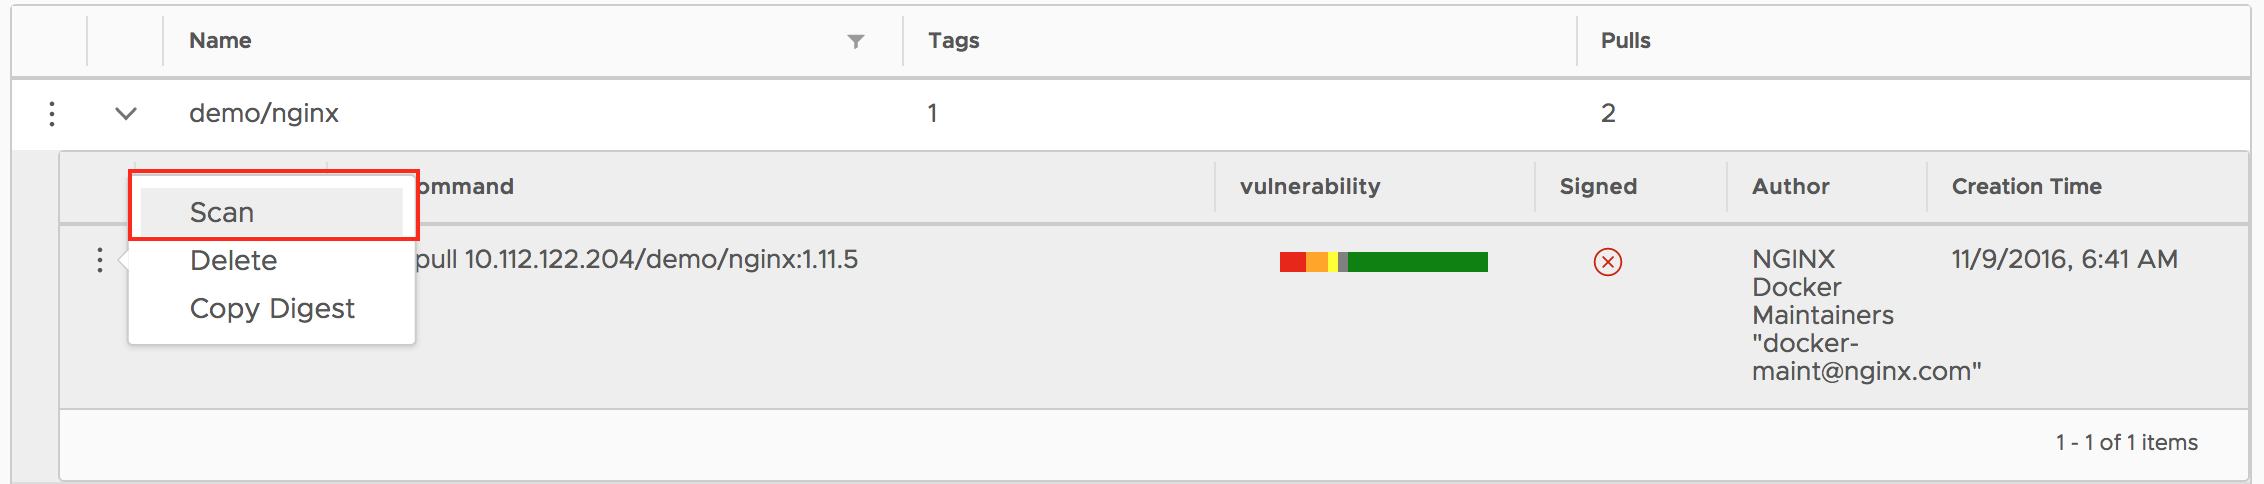
Scanning an image
Enter your project and locate the specified repository. Expand the tag list via clicking the arrow icon on the left side. For each tag there will be an 'Vulnerability' column to display vulnerability scanning status and related information. You can click on the vertical ellipsis to open a popup menu and then click on 'Scan' to start the vulnerability analysis process.
 NOTES: Only the users with 'Project Admin' role have the privilege to launch the analysis process.
The analysis process may have the following status that are indicated in the 'Vulnerability' column:
- Not Scanned: The tag has never been scanned.
- Queued: The scanning task is scheduled but not executed yet.
- Scanning: The scanning process is in progress.
- Error: The scanning process failed to complete.
- Complete: The scanning process was successfully completed.
For the 'Not Scanned' and 'Queued' statuses, a text label with status information is shown. For the 'Scanning', a progress bar will be displayed.
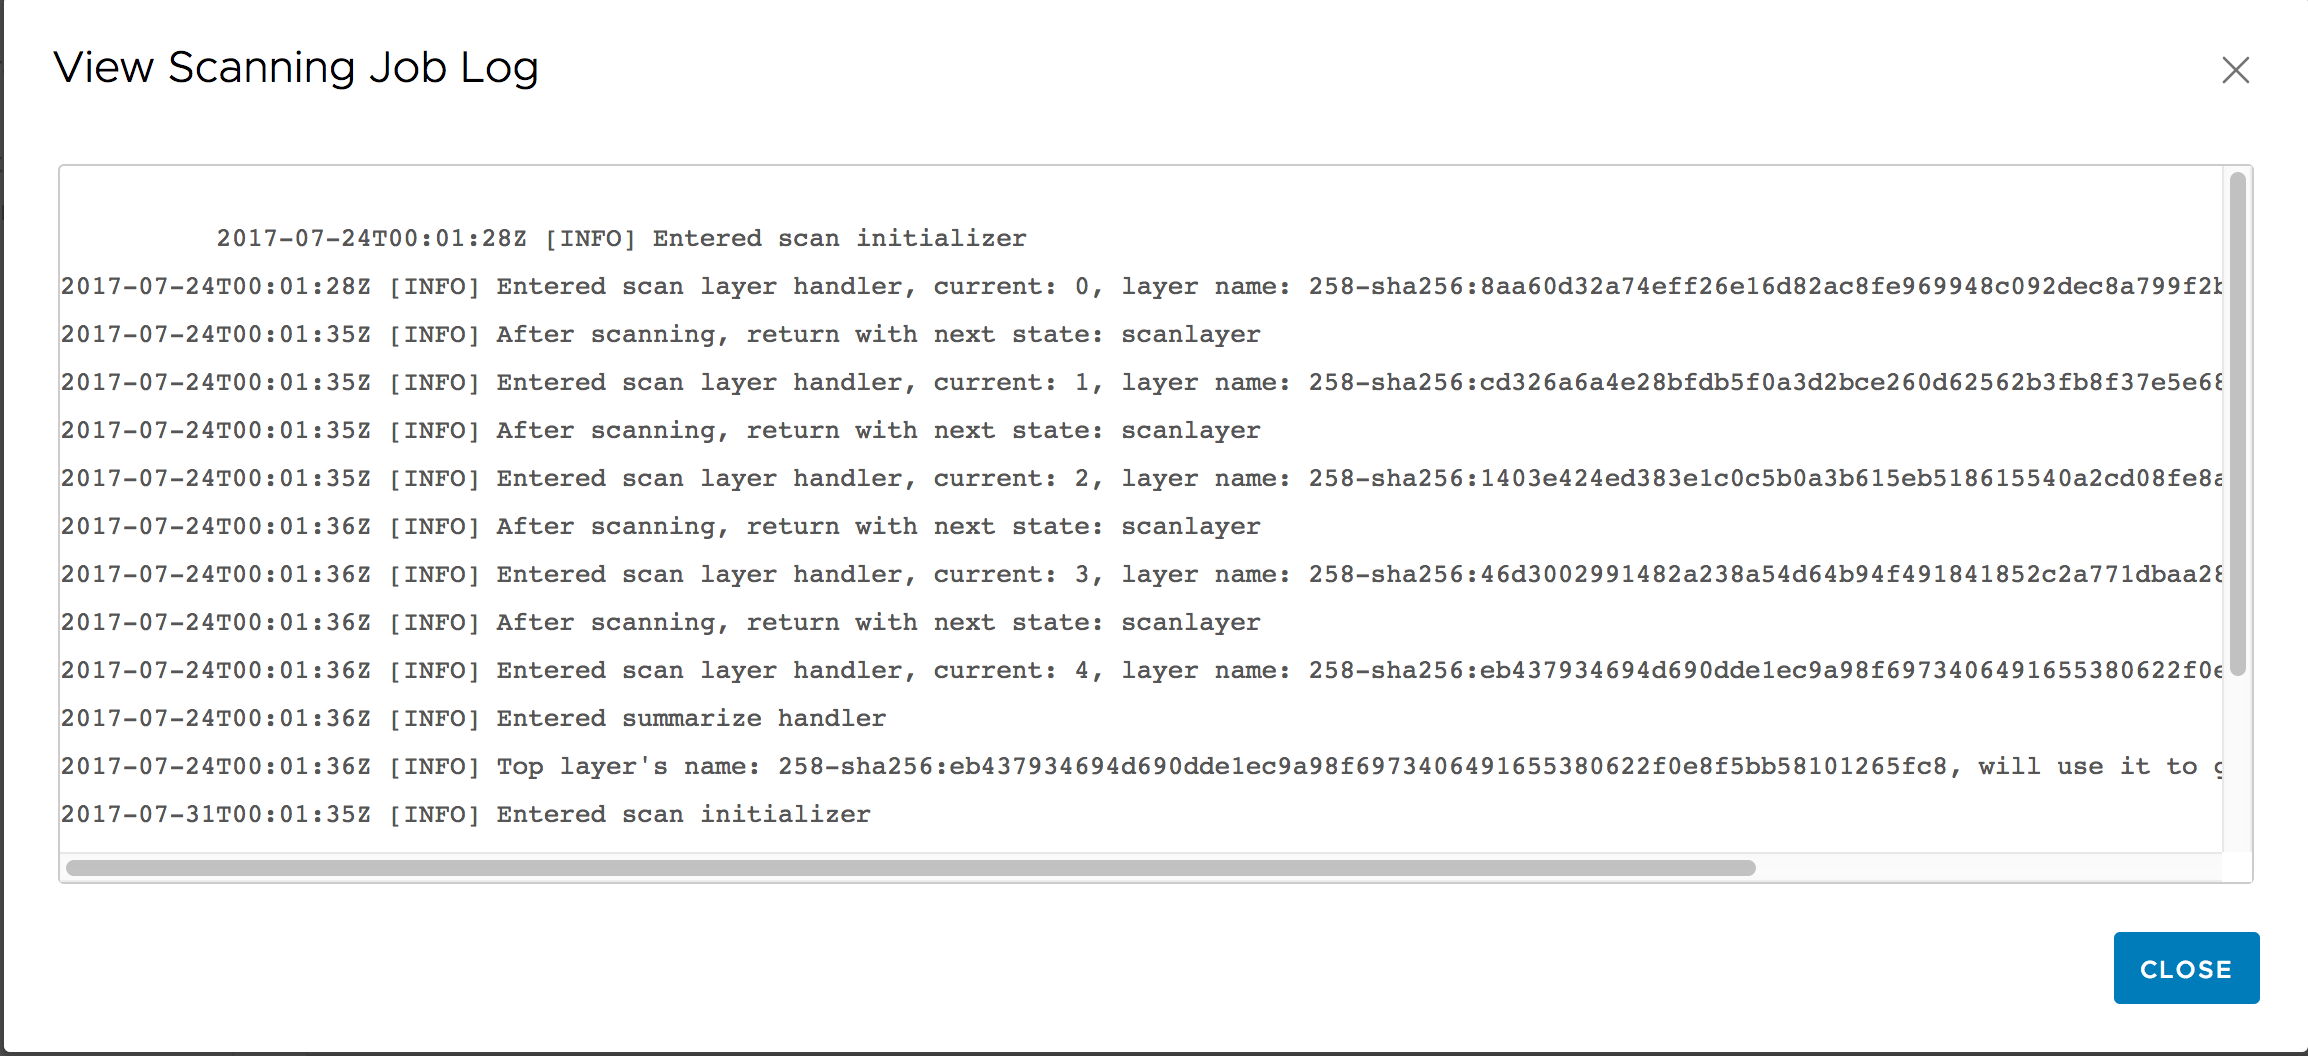
If an error occurred, you can click on the 'View Log' link to view the related logs.
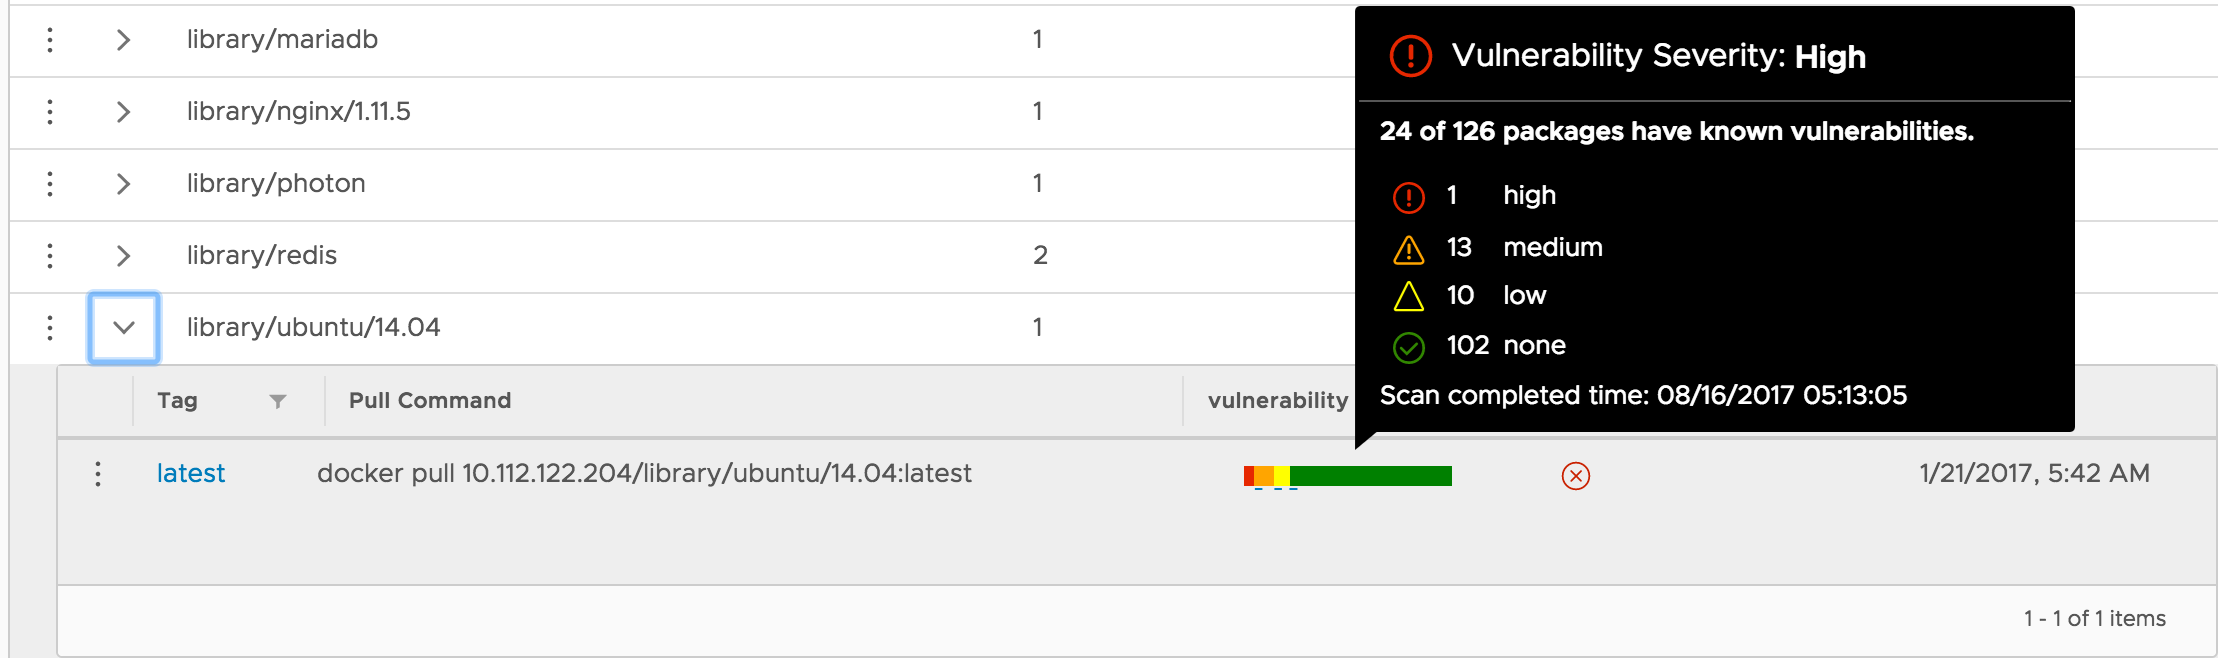
If the process was successfully completed, a result bar is created. The width of the different colored sections indicates the percentage of features with vulnerabilities for a particular severity level.
- Red: High level of vulnerabilities
- Orange: Medium level of vulnerabilities
- Yellow: Low level of vulnerabilities
- Grey: Unknown level of vulnerabilities
- Green: No vulnerabilities

Move the cursor over the bar, a tooltip with summary report will be displayed. Besides showing the total number of features with vulnerabilities and the total number of features in the scanned image tag, the report also lists the counts of features with vulnerabilities of different severity levels. The completion time of the last analysis process is shown at the bottom of the tooltip.
Click on the tag name link, the detail page will be opened. Besides the information about the tag, all the vulnerabilities found in the last analysis process will be listed with the related information. You can order or filter the list by columns.

NOTES: You can initiate the vulnerability analysis for a tag at anytime you want as long as the status is not 'Queued' or 'Scanning'.
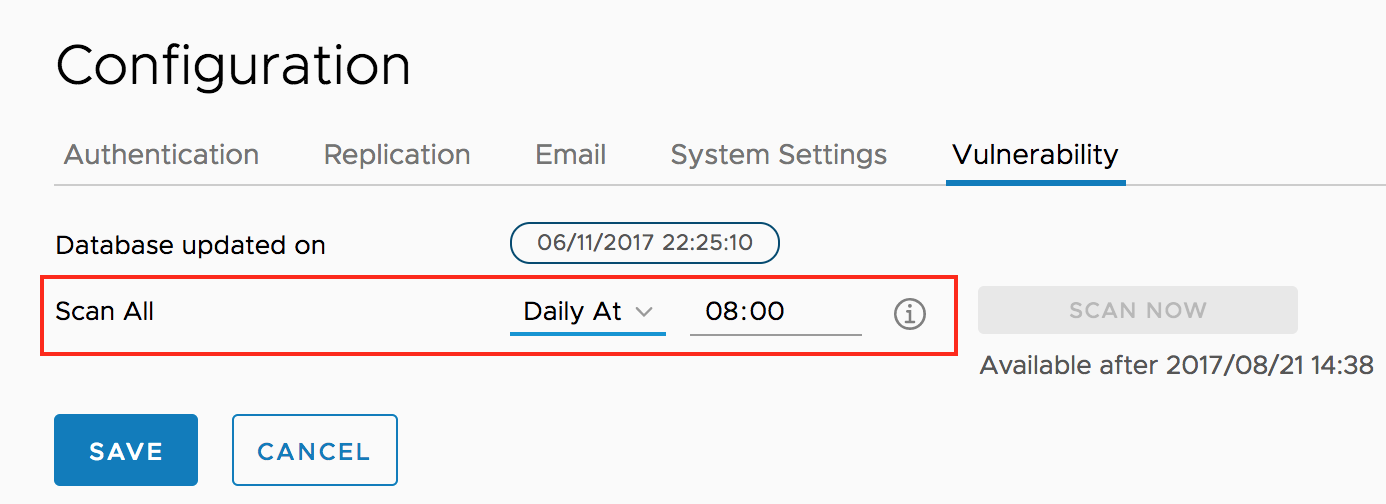
Scanning all images
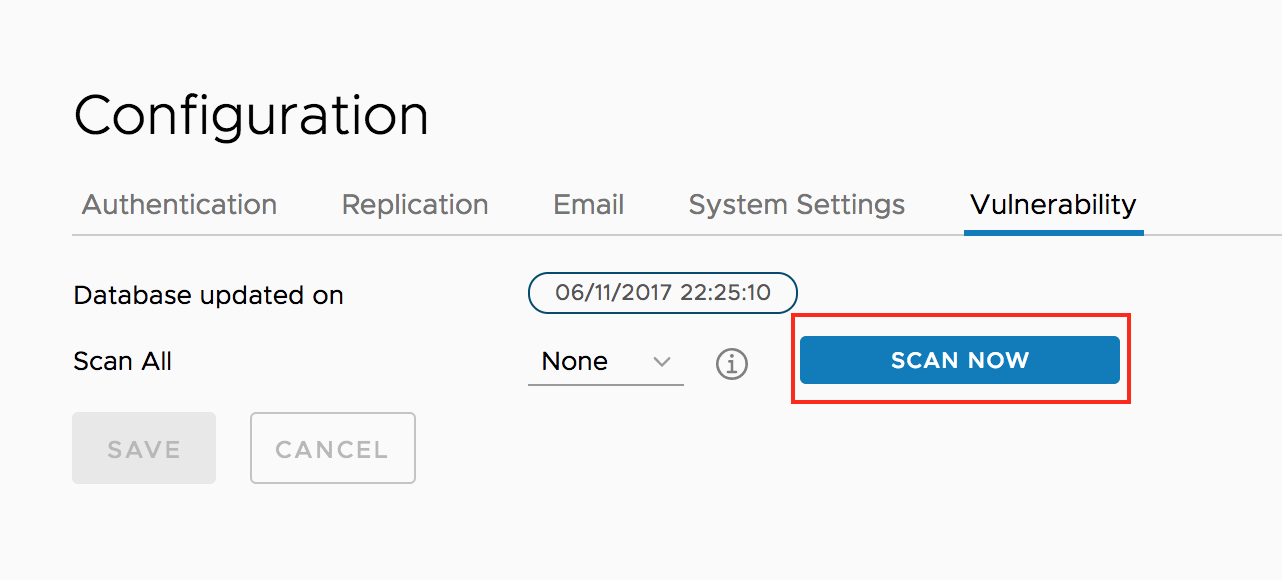
In the 'Vulnerability' tab of 'Configuration' section under 'Administration', click on the 'SCAN NOW' button to start the analysis process for all the existing images.
NOTES: The scanning process is executed via multiple concurrent asynchronous tasks. There is no guarantee on the order of scanning or the returned results.
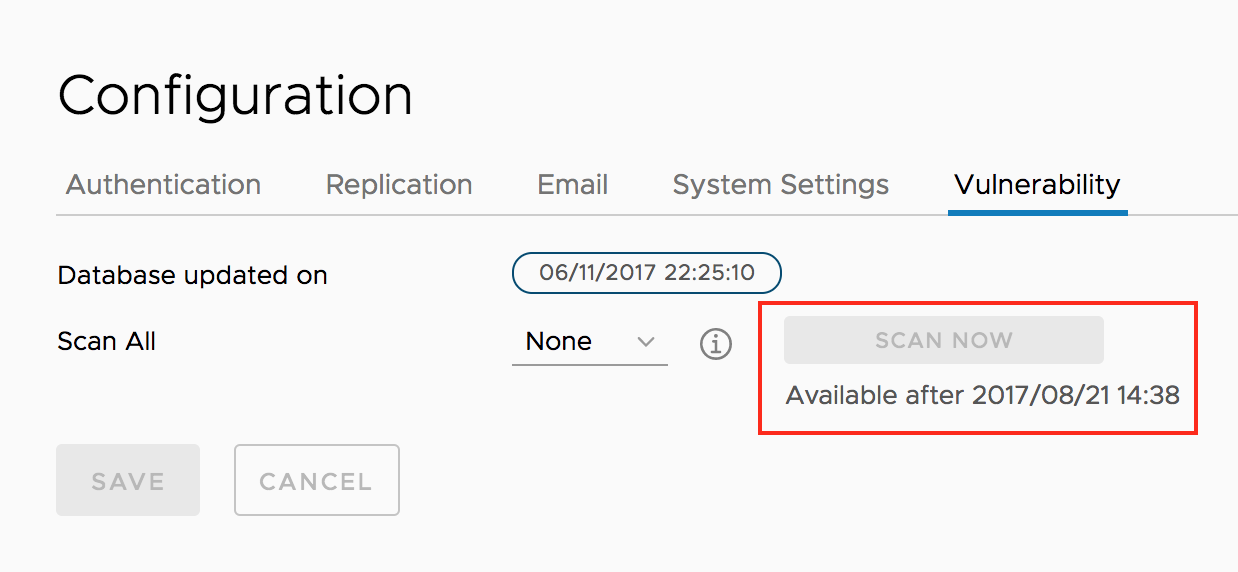
To avoid frequently triggering the resource intensive scanning process, the availability of the button is restricted. It can be only triggered once in a predefined period. The next available time will be displayed besides the button.
Scheduled Scan by Policy
You can set policies to control the vulnerability analysis process. Currently, two options are available:
- None: No policy is selected.
- Daily: Policy is activated daily. It means an analysis job is scheduled to be executed at the specified time everyday. The scheduled job will scan all the images in Harbor.
NOTES: Once the scheduled job is executed, the completion time of scanning all images will be updated accordingly. Please be aware that the completion time of the images may be different because the execution of analysis for each image may be carried out at different time.
Video demo:  youtube , Tencent Video
Pull image from Harbor in Kubernetes
Kubernetes users can easily deploy pods with images stored in Harbor. The settings are similar to that of another private registry. There are two major issues:
- When your Harbor instance is hosting http and the certificate is self signed. You need to modify daemon.json on each work node of your cluster, for details please refer to: https://docs.docker.com/registry/insecure/#deploy-a-plain-http-registry
- If your pod references an image under private project, you need to create a secret with the credentials of user who has permission to pull image from this project, for details refer to: https://kubernetes.io/docs/tasks/configure-pod-container/pull-image-private-registry/